17_04

He Lives Easter-Passover Easel Card - DCWV and Pazzles


Hello crafty friends, A few days ago I shared a card I created for the Pazzles Craft Room. I was tasked with creating a project for Easter. I decided to create this pretty easel card.
I started by using my software to create the various elements including the card base. I cut the base out of some Kraft cardstock. I then turned to my DCWV Scripts and Music Notes Stack for the soft pink printed layers.


I then went to work on creating my lilies. I cut these out of some white cardstock and then used some yellow and green ink to dab just a bit of color in the centers of them. I then used a Copic Marker to color the stamen as I had cut them out of the same white cardstock. I also used a fine tip Sharpie for the little dots. I also used some green ink to sponge onto the leaves. 

For the cross, I didn’t have any chipboard on hand, so I cut three crosses out of the same Kraft cardstock as the base of the card. I glued them together to make the cross sturdier. I then dry embossed it to give it that wood grain type look. I used one of my embossing folders for this. I used some brown ink to ink the edges and to make the embossing pop.

I then turned back to my Pazzles to create my sentiment. I welded the sentiment together and it created an “outline” I used a fine tip sharpie to draw the outline with my machine. I then cut it out. I used the same sharpie to color in the lettering and then covered it with my Spectrum Noir Glitter Markers for a little extra flair. 

I also used the Glitter Marker for the lilies. I decided to make the card an easel card. I did this by scoring the top half of the card base across horizontally and then using another top base for the top of the card. I finished off the card with some pearl embellishments and a bow. I really enjoyed creating this card and my Pazzles once again, helped make my idea come to life! 


Supplies Used:
Pazzles Inspiration Vue
DCWV Scripts and Music Notes Stack
White Cardstock
Yellow, Green and Brown Ink
Pearl Stickers
Kraft Cardstock
Copic Marker
Sharpie Marker
Spectrum Noir Glitter Markers
Lavender Polka Dot Organza Ribbon

I hope your Holiday weekend was a great one spent with those you love and remembering what the true meaning of this blessed season is! Until the next time,


Paper House Productions Wedding Flip Album

Hello crafty friends!
Melinda here with you today. The design team has been sharing these fantastic flip albums by Paper House Productions. I got to work with the Wedding Flip Album!
Paper House Productions Flip Album Wedding
Here’s what it looks like closed. I love the layers and the printed papers. It also comes with a sheet of stickers and some gold foil photo corners. Makes it all very elegant and SUPER EASY to put together.Some of the papers include foil accents already, so this was really a “no brainer” to coordinate the included photo corners and stickers.
Supply List
Paper House Productions Flip Album Wedding
Here it is with the first section lifted up. I added some little white cardstock flowers and leaves. I chose to mat my photos on white cardstock to make them pop a little more.
Paper House Productions Flip Album Wedding
Here is the next layer up. I kept the pages really simple. I added some gold photo corners.
Paper House Productions Flip Album Wedding
This next section has a pocket. It has a pre-printed base that pulls out. Perfect for adding some more photos.
Paper House Productions Flip Album WeddingPaper House Productions Flip Album WeddingPaper House Productions Flip Album Wedding
This section opens up and has a spot for you to journal. I left it blank so my niece can add her thoughts there.
GEDSC DIGITAL CAMERA
Here is another shot where you can see I added some of the stickers and one of the sticker sentiments.
Paper House Productions Flip Album Wedding
Here is the bottom layer and the base layer.  I cannot tell you how easily this came together! This is the perfect set to get some great photos together quickly and easily! I know my niece is going to love this as a sweet little gift!
Be sure to head over to the Paper House Productions shop and check out the entire collection of flip albums! They are a fantastic price point and really easy to put together!
As always, thank you so much for stopping by. Be sure to sign up for my newsletter and please do me a favor and follow my blog! Until the next time,

17_03

Southwest Scrapbook Layout & Card

Hello crafty friends, Today is my day to share over at the Paper House Productions blog. I created a scrapbook layout and a card!  I used the fun Southwest Adventure paper crafting kit.
Here's my finished layout. I used papers and elements from the Southwest Adventure paper crafting kit. The papers and elements were the perfect compliment to pictures of my beautiful niece Taylor.
Southwest Adventure Awaits Scrapbook Layout SUPPLIES LIST
  • Southwest Adventure Paper Crafting Kit is discontinued HOWEVER, you can still get the great cardstock sheet of stickers from Scrapbook.com CLICK HERE

The papers in the kit also includes journaling cards of various sizes and with a variety of sentiments.
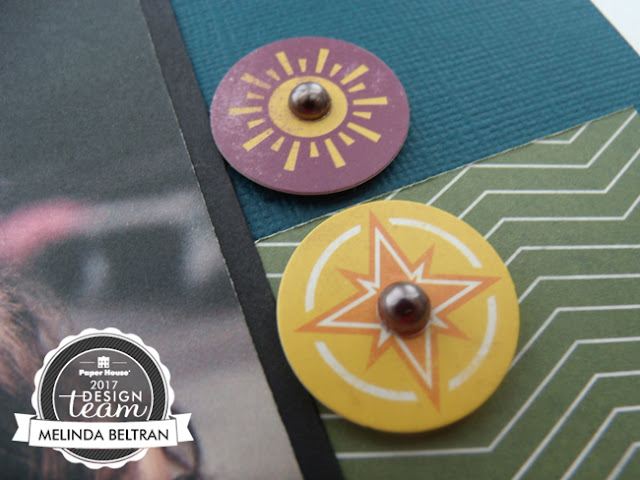
In addition, it has a sheet of fantastic cardstock stickers. Here is one that I added a couple of flat back metallic pearls.


Here is a closer look at some thick twine and some brads I used to wrap one of the patterned paper layers.

Here is another cardstock sticker. I used some dimensional tape underneath it to give it some extra lift.


Now for my card

Here's a look at my completed card. I once again used the Southwest Adventure paper crafting kit to create my card. All of the papers with the exception of the Kraft & peacock cardstock are from the collection. I love that the papers are double-sided and all coordinate perfectly! Takes the guess work out of it.

Here is a side view to show you the various layers. I used some foam tape to give them some lift.

Here's a closer look at the sentiment. It was created with stickers from the cardstock sticker sheet included in the kit.
Here is another view to show all the fun dimension and elements.

SVG CUT FILE

I created the cut file I used for the card. It works with electronic die cut machines (i.e. Silhouette Cameo, Cricut Design Space, Pazzles, etc.). You can head over to my SVG shop and pick it up there.

You can also check out the other scrapbook layout I created with this same kit! CLICK HERE.....Talk about mileage!

As always, thank you so much for sharing your crafty time with me. Please take a moment to follow my blog and sign up for my newsletter. I would really appreciate it...it will keep you up to date on my latest projects!

You can also join me over at.....

Until the next time, have a wonderfully crafty day!

Don't Forget To Sign Up For My Newsletter To Receive
The Subscriber Only FREEBIES and other exclusive info!