16_04

Birthday Floral Card

Happy Birthday Floral Card By Melinda
Hello crafty  friends,  I am back again! Today I am sharing this pretty birthday card I made for someone special.
happy-birthday-floral-card-melinda-b[1]
I created all of the elements as SVG cut files and they are exclusively in the Pazzles Craft Room.


flower-svg-melinda-beltan-650_thumb2[2]
I started with cutting out the flower, leaf and wreath elements in white cardstock. I inked the edged of the flowers with my light pink ink. I then layered and staggered the pieces. I then turned to the leaves and inked them lightly with my pear ink. I wanted the elements to have just a touch of color.
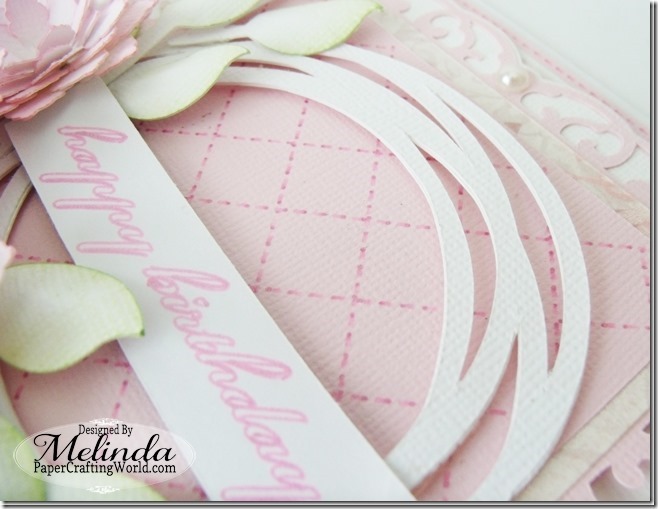

wreath-closoeup-650_thumb2_thumb1
I cut the wreath out two times and then layered them so the element would be just a bit stronger.
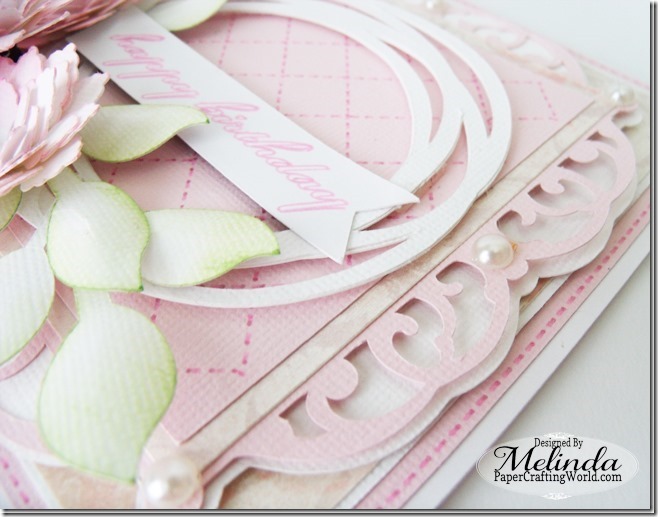
side-view-wreath-pen-tool-650_thumb2
For the patterned paper I used some pretty paper from the DCWV Luxury Stack. For the pretty ornate frame element, I cut it out of pink cardstock and the bottom layer in white cardstock. I used some foam tape to give that layer a little extra dimension.

birthday-closeup-pen-tool-melinda-be
I then turned to my Pazzles Pen tool. I used my pink glitter gel pen and designed the diamond pattern on the top mat. Instead of “cutting” the pattern, I used my pen tool and “drew” the pattern. This made the stitch look I was after perfect. I wanted a very subtle pattern and having my Pazzles machine create it for me was the perfect alternative. I then used a font on my computer and my pen tool one more time to draw out my sentiment. While it wasn’t a single line font, I liked the look I achieved.

edge-closeup-650_thumb2_thumb1
I did the same thing for the larger pink mat. I just created a smaller mat and used the stitch line. This made the stitching look consistent which is hard for me to do “freehand”.

bow-closeup-650_thumb1_thumb1
Lastly I added a bow and some pearl accents and then assembled it all. I love the way it turned out.

happy-birthday-floral-card-melinda-b[5]
Here is one last look at the completed card. It is a 5.5 x 5.5 sized card. I think the recipient is going to love it. I sure hope she does!
Supplies Used
White and Pink Cardstock
May Arts Ribbon
Paper Studio Pearl Accents

Don't forget to head over and check out the Pazzles Craft Room. They have so many wonderful projects to get your creative juices flowing. I love that the projects they showcase are for ALL skill levels of crafters and not just the "over the top" projects. Plus, if you have a craft cutter, you may want to join the craft room. All their files are in SVG as well as WPC format! A whole new world of possibilities!


Until the next time,

Goodbye Cartridges 125x125

Discover Creative Freedom 300x250
Don't Forget To Sign Up For My Newsletter To Receive
The Subscriber Only FREEBIES and other exclusive info!


Hi SVG Card By Melinda Beltan

Hi, Hi,Hi dear crafty friends. Sorry I have been MIA. But I am back!  I have been doing a little crafting here and there and well today I wanted to share a card I recently created for the Pazzles craft room. Have you ever wanted to send a special someone a note just to say hi? Well here’s a card I created that would fit that bill.
SVG Flower Cut File Card Melinda Beltran
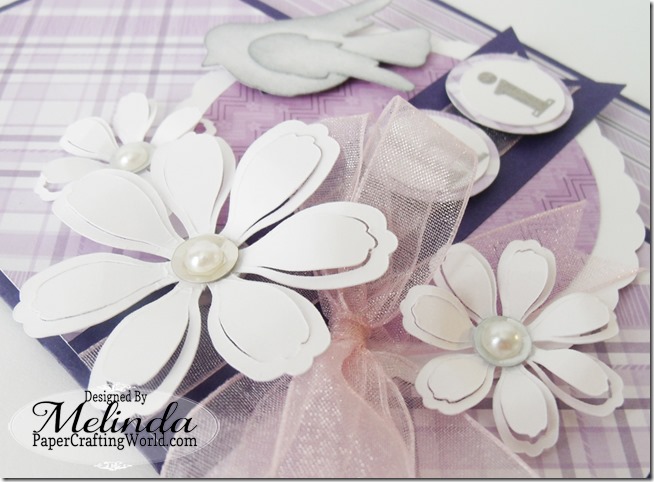
I started by using the hi floral card file set I created exclusively for the Pazzles Craft Room. I used the DCWV Bouquet de Fleur Stack for all the patterned papers. I cut my flowers out in white cardstock. I wanted to give the card a clean look.

SVG Flower Cut File Card Melinda Beltran
I added some silver sequins and little pearls to the centers of the flowers.

Hi SVG Cut File Card By Melinda Beltran
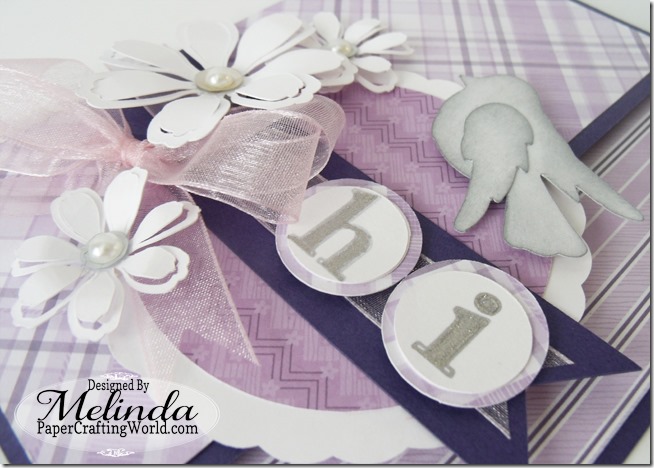
  I cut my bird pieces out of plain white paper. I then used my silver cat’s eye ink to ink the bird lightly.

Hi SVG Cut File Card By Melinda Beltran
This gave the die cut a little color and shimmer without too much color.

Hi SVG Cut File Card By Melinda Beltran
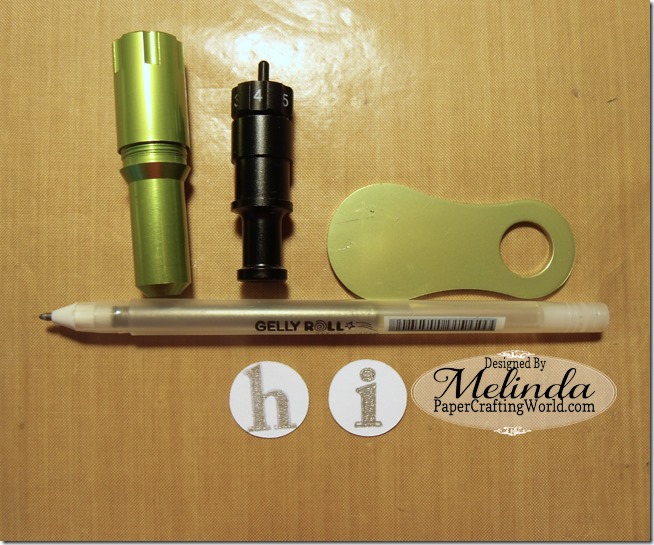
I then turned to my pen tool and used my silver stardust gelly roll pen and used it to draw my two letters. In the software you have the ability to “fill in” the letters by using the “engraving” function. I was able to “color in” the letters and then cut them out, easy peasy.

Hi SVG Cut File Card By Melinda Beltran
I then simply added the flowers and layered all my pieces. I added a sweet bow with some pretty May Arts organza ribbon to finish off the look. It came together very well and will make the perfect little “hi” for my dear friend.

Hi SVG Card by Melinda Beltran
Here is one last look at my completed card.

Supplies Used
Hi Floral Card File
Pazzles Pen Tool
CTMH Tiny Pearl Accents
White and Purple Cardstock

Don’t forget to head over to the Pazzles craft room and check out all the wonderful projects the other designers have made. Plus you can join the craft room too!!!  Until the next time, have a wonderfully crafty day!

Goodbye Cartridges 125x125


Discover Creative Freedom 300x250


Don't Forget To Sign Up For My Newsletter To Receive
The Subscriber Only FREEBIES and other exclusive info!


16_02

Friend Card With Pazzles

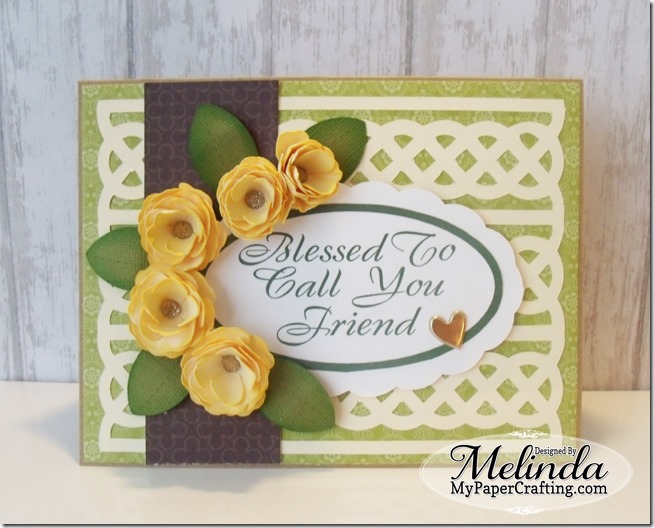
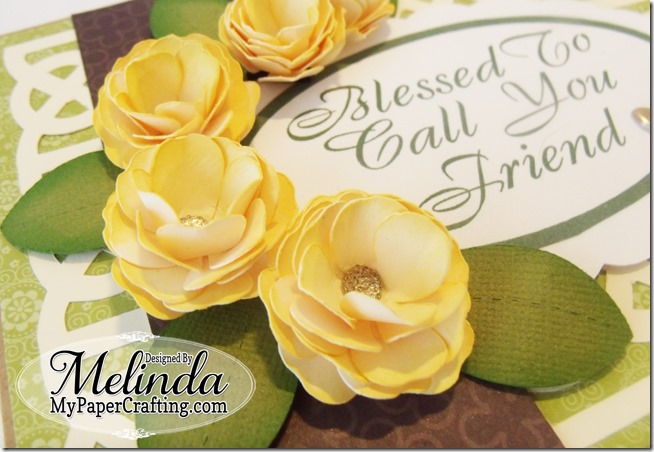
Hello craft room friends, today I am sharing a pretty card I created with a St. Patrick's day theme.  I made this for the Pazzles Craft Room. I decided to use the Celtic knot background card cut file set and created this rendition. The patterned paper I used was from the All Seasons recollections paper stack.
GEDSC DIGITAL CAMERA
Here’s a look at my completed card. The finished size is 5x6.5. I started with a Kraft cardstock base. I then cut the Celtic knot background layer and the flowers from the Vanilla Cream cardstock.

GEDSC DIGITAL CAMERA
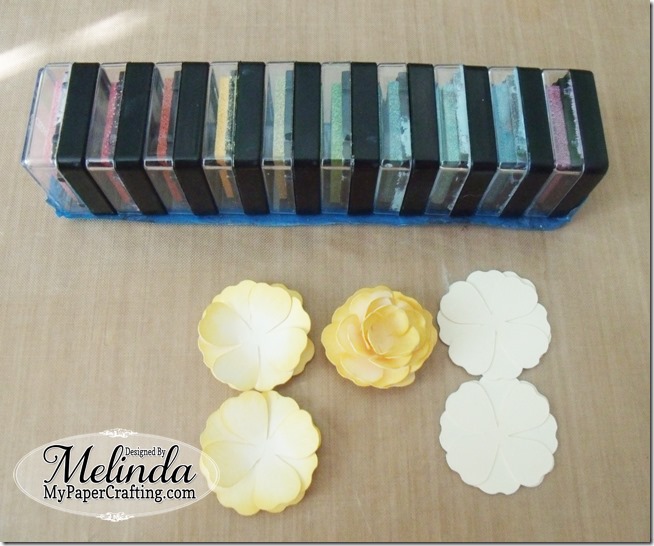
I inked the edges of the flower petals with some Canary pigment ink from the CTMH Whimsy Ink Pad Assortment. I then used my McGill flower sculpting tool to give the petals some form. I layered four layers of flowers and staggered them on top of each other. This gave me more petals to work with. For the centers of the flowers I added some bling gems assortment.

GEDSC DIGITAL CAMERA
Here is a closer look at the layered, finished flower.

GEDSC DIGITAL CAMERA
Here’s another closer look. You can see that I also inked the edges of the leaves.

GEDSC DIGITAL CAMERA
For the last part, I used the print n' cut feature to print then cut out the sentiment. I added it to a scalloped layer and then added some foam tape underneath to give it a little lift. I also added a little gold heart from the treasured puffies sticker assortment from Close To My Heart and all done!!! Be sure to head over to Pazzles to check out other great projects. PLUS, you can sign up to join the craft room and download this cut file set along with thousands of others!!!

Supplies Used
pcw blessed to call you friend card-450 
Recollections All Seasons Paper Pad

Goodbye Cartridges 125x125

As always, thank you so much for stopping by and sharing your crafty time with me. Until the next time, have a wonderfully crafty day!


Discover Creative Freedom 300x250


Don't Forget To Sign Up For My Newsletter To Receive
The Subscriber Only FREEBIES and other exclusive info!


Heart Card Pazzles Craft Room

Hello crafty friends,
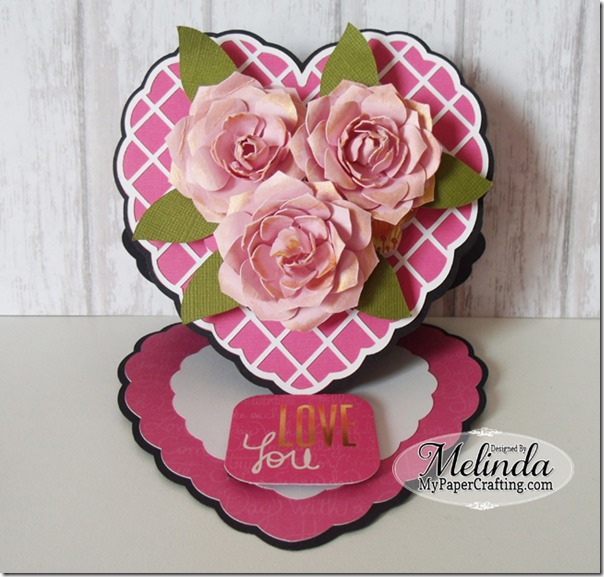
I am sharing a beautiful, paper roses, handmade card I created for the Pazzles Craft Room. Pretty Paper Roses, Dimensional SVG cut flowers are so much fun to make. The base is a beautiful lattice svg cut heart shape. Easel cards are always so much fun to make. So here is what I came up with.

Paper Roses Flowers Dimensional SVG Heart Shaped Easel Valentine Love Card
It is one of the new files in the Pazzles craft room. I started with a Black cardstock base. I then cut out the layers in various cardstock. The patterned papers were from the DCWV Haute Pink Stack. I also used the sentiment from the stack too.

Paper Roses Flowers Dimensional SVG Heart Shaped Easel Valentine Love Card
Here’s the paper roses and the card closed.

Paper Roses Flowers Dimensional SVG Heart Shaped Easel Valentine Love Card
I made the pretty paper roses with the layered rose svg flower file that created these gorgeous dimensional flowers. I used my McGill Flower sculpting tools and then bent and curled the petals to give them a more realistic look. I finished off the edges with some gold smooch ink. They turned out very pretty. 

Paper Roses Flowers Dimensional SVG Heart Shaped Easel Valentine Love Card

Paper Roses Flowers DCWV Haute Pink Stack SVG Heart Shaped Easel Valentine Love Card
I decided to make the base of the card an easel card. this is very simply accomplished by creating a fold or crease on the top flap of the card. The you cut out another layer the same size as the base and adhere that to the top half of the creased layer. Very simple and effective. I also used some foam tape to give the layers some extra dimension. I enjoyed making this card. These flowers are the closest thing to a "green-thumb" I have! 

Be sure to head over to the Pazzles Craft Room and check out the other projects by the design team. And don’t forget to join the Craft Room too!
Supplies Used
Lattice Heart Shaped SVG Cut File: Pazzles Craft Room
Dimensional Rose SVG Cut File: Pazzles Craft Room
Black, White, Green and Pink Cardstock
Gold Smooch Ink

 
I am entering my card in the following challenges:
House of Cards: Shaped Cards
Crafting From The Heart: Anything Goes
My Sheri Crafts Challenge: Valentine
Die Cuttin’ Divas: Love Is In The Air

Also, here are just some of the latest, super cute files I have created exclusively for the Pazzles Craft Room. If you are a subscriber, you can download these files!!!!
JOIN THE PAZZLES CRAFT ROOM HERE
pcw love bandit title-450 pcw raccoon sitting w key-heart-450
pcw heart scalloped shaped card-450 pcw layered rose-450
pcw Raccoon Topper in Tree Trunk-450 pcw-raccoon-w-snowball-450
pcw raccoon skating-450 pcw great to skate title-450
JOIN THE PAZZLES CRAFT ROOM HERE

Well, again, that covers it for today. Until the next time,

Discover Creative Freedom 300x250
Don't Forget To Sign Up For My Newsletter To Receive
The Subscriber Only FREEBIES and other exclusive info!