15_05

Pazzles Craft Room Live In The Moment Card

Happy Wednesday Crafty friends,

It's my turn to share on the Pazzles Craft Room site today. So I decided to share a pretty but easy card you can make in no time at all!

GEDSC DIGITAL CAMERA
For my card I used the Fancy Floral Frame cut file I found in the craft room. When I saw it, I thought...what a gorgeous file. The finished card size is 5 x 6.5.  I sized the frame a quarter inch smaller than the base. I wondered how it would cut and was not disappointed. It cut beautifully. Pazzles craft room files are all in the native .wpc pazzles format as well as the .svg format. So even if you don't own the Pazzles machine, having a subscription to the craft room is still a fantastic value. You have access to THOUSANDS of files for your crafting!

GEDSC DIGITAL CAMERA
I then turned to my In the Moment stamp set. I used my Versamark Ink Pad  to stamp the flourished frame and then used some Stampendous Jeweled Gold Embossing Powder and heat set it. I then stamped the sentiment with my Cashmere Ink Pad.  I cut the sentiment out and then used some foam tape under it to give it a little lift.


GEDSC DIGITAL CAMERA
I then added a bow and a Prima flower from my stash. The green mat and the colored mat under the frame are patterned papers from the DCWV Dear Jane Stack. The base was Colonial White Cardstock. I finished it off with some pearls from the Paper Studio.  The card doesn't have too much on it as I really wanted the frame to be the focal point of the card, it is such a beautiful file. This card came together fast and beautifully!


Supplies Used
Foam Tape
Gold Trimmed Ribbon From My Stash
Prima Flower

Be sure to head over to the Pazzles craft room and check out all the wonderful files. If you are thinking about getting an electronic die cut machine, then seriously think about the Pazzles Inspiration Vue. You can get 
it for as little as $99 down!!!
Discover Creative Freedom 300x250

Well, that about covers it for today crafty friends. As always, thank you so much for stopping by 


Don't Forget To Sign Up For My Newsletter To Receive 
The Subscriber Only FREEBIES and other exclusive info!

Hooray It's Your Day Card

Happy Tuesday crafty friends,
Hope those here in the states had a great holiday weekend. It was a busy weekend with celebrating Memorial Day as well as Shavuot. Thanking God for the blessing of the Holy Spirit our Comforter as well as the blessing of so many men and women who have fought for our freedom and liberties.  With the season also comes the wrapping up of the school year which means a lot of graduations!  So I am going to share a few projects through out the week here. Let’s get started.


Here’s a look at my completed card. The papers are from the DCWV Edumacation Stack. The base is from Kraft cardstock. I started by using the card basics cut file kit from PaperCraftingWorld.com . I cut the base out of the kraft cardstock. I cut the zigzag frame and one of the mats in some golden yellow cardstock. I then cut one of the other mats in white cardstock and then the other in some fun school print paper from the DCWV Edumacation stack papers. The card base is also covered by that same print and then underneath the zigzag frame I have a piece of diagonal pinstripe red paper from the same Edumacation Stack.


I used the Hooray It’s Your Day Digi Printable from PaperCraftingWorld.com I simply printed it out the finished colored png. I added some Golden Rod Stickles to some of the dots for a little extra, but understated bling.


Hooray it’s your day digital printable set. On sale this week. 
PLUS spend $5 and get an additional 50% off!


Card Basics zigzag cut file set. On sale this week too!


Here’s a closer look at the little banner with a button and some twine from the Twinery. The apple print paper is also from the DCWV Edumacation Stack. In this shot you can also see some of the gold stickles I used for the dots.


Here’s a view of it opened. You can see the edge of the zigzag cut perfectly. I threaded some ribbon through the zigzag frame and then added a fun bow. Easy peasy!


Again, one last look at the finished card. 

Don’t forget, PaperCraftingWorld.com has several fun graduation celebration files on sale this week. Plus Spend $5 and get an additional 50% when you use code PCW50! A great value.

Supplies Used
DCWV Edumacation Paper Stack
Pazzles Inspiration Vue Machine
Hooray it’s your day Digital Printable
Gold Cardstock
Goldenrod Stickles
Twine from the Twinery
Misc. Ribbon and button

Be sure to stop back by tomorrow as I share another card. A pretty one. Here’s a sneak peek


As always, thank you so much for stopping by and sharing your crafty time with me. It is sincerely appreciated as is your kind comments.

Don't Forget To Sign Up For My Newsletter To Receive 
The Subscriber Only FREEBIES and other exclusive info!


Sisters Forever Pazzles Layout And Freebie Reminder

GEDSC DIGITAL CAMERA

theme week favorite things-800
Happy Monday Crafty Friends, 
Hope you had a wonderful weekend and that your weekend included some crafty time. This week over at the Pazzles Craft room blog we are having a theme week. This week’s theme is our Favorite Things. We were tasked with using and or incorporating our favorite things for crafting.  It wasn’t hard for me to think about this at all. As my favorite craft tool….HANDS DOWN is my Pazzles Inspiration Vue! This machine literally changed my craft focus and direction. So let’s get to  my project.
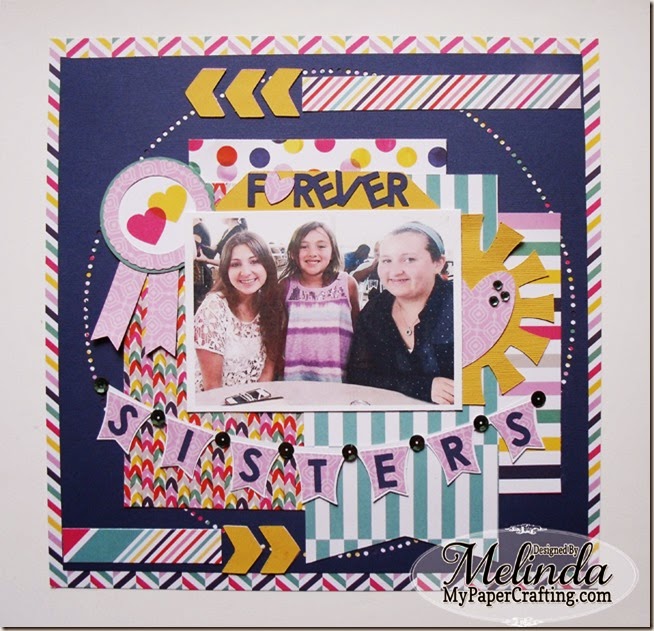
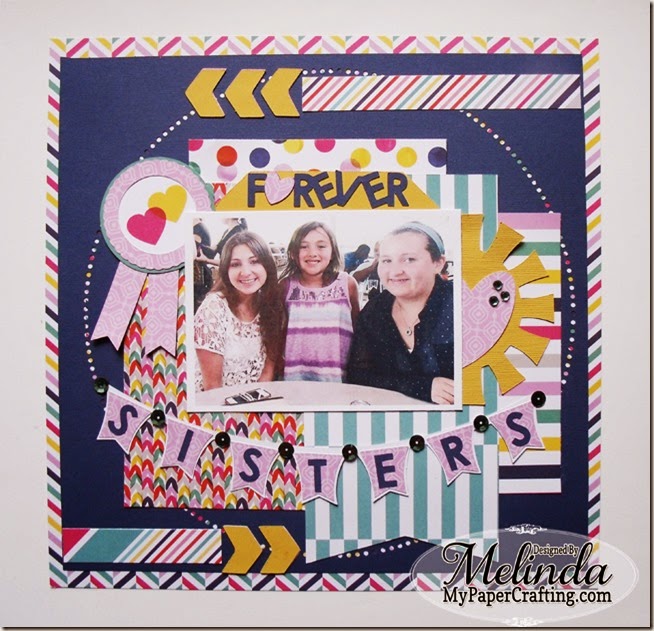
GEDSC DIGITAL CAMERAHere is my finished project. It is a scrapbook layout featuring three of my six beautiful nieces. Now to create this layout, I started with one of the main components and reasons why I love my Pazzles Inspiration….The Software. With the software, you can layout your project completely, before you cut a single thing. You can even add your pictures in to size them and figure out the perfect size to print them out.

SISTERS LAYOUT-pi-800
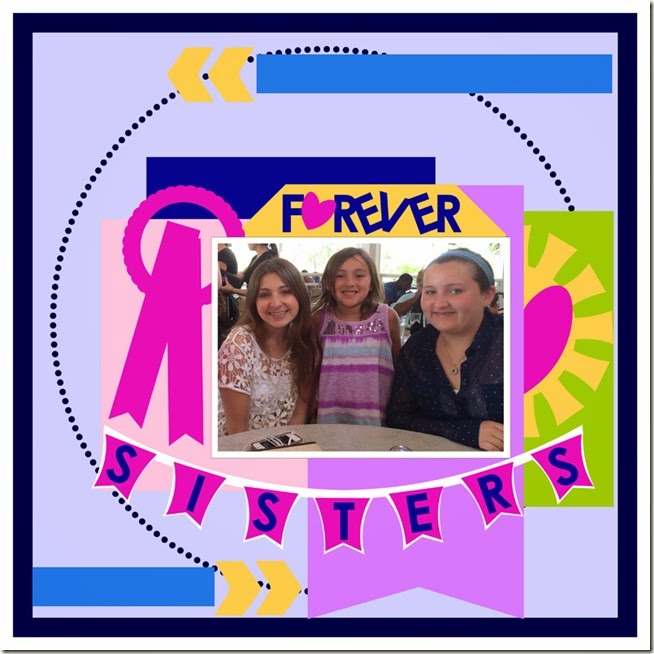
Here is what I mean.   This is a screen shot of what the layout looks like in the software. You can add all of your elements, move them around and resize them. You can also edit elements quickly and easily to help create the finished look. As you can see by this screen shot, you can even add in your pictures and move it around just like any other element. I even try to play with colors so that I can get somewhat of a visual idea of what colors or color scheme to use for my layout.

dreamy-day-layoutlife-is-good-layout
my-family-layout
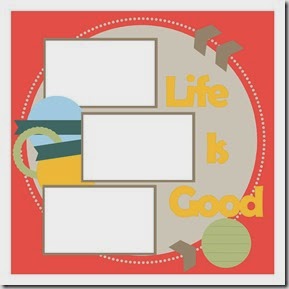
For My layout, I combined elements from these three cut and paste layout files that Pazzles offered for National Scrapbook Day FREE! As you build your library of files, you can open up and copy and paste different elements from different projects to use again and again! Following are some close up shots of the details.

GEDSC DIGITAL CAMERA
Here is a closer look at some of the arrows. I also created the Forever title and used the top portion of one of the tags from the My Family layout

GEDSC DIGITAL CAMERA
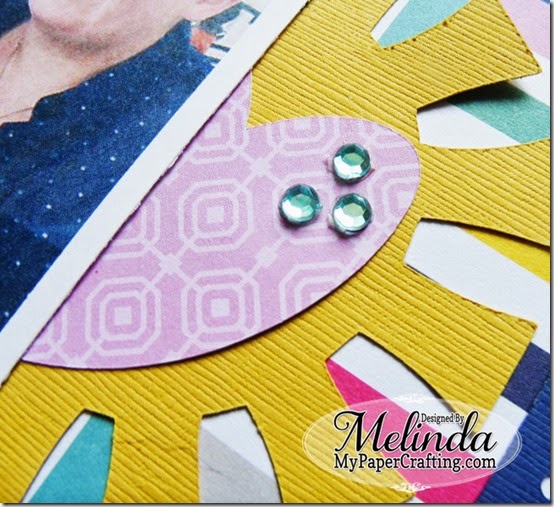
Here’s a closer look at the sun and heart die cuts. I also added some clear gems that I lightly colored with one of my alcohol markers.

GEDSC DIGITAL CAMERA
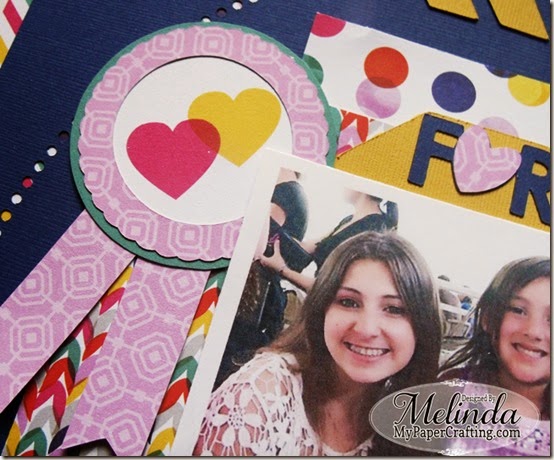
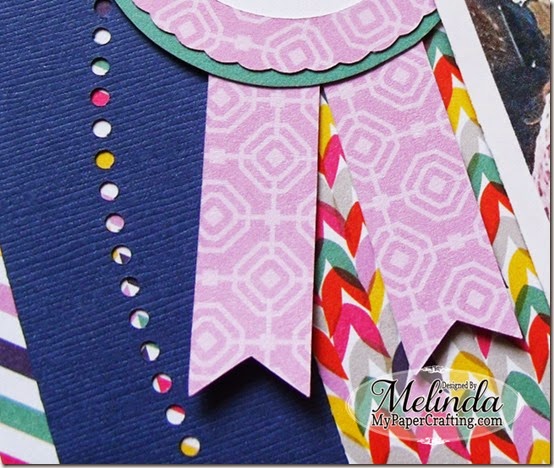
I added this cute ribbon by using elements from the Life is good layout. The colored hearts were from the same DCWV Chick Chat Stack.

GEDSC DIGITAL CAMERA
Here is a closer look at the Sisters Banner. I used the banner elements from the A Dreamy Day layout but for the banner base, I added a strip and welded them together.

GEDSC DIGITAL CAMERA
Here is a closer look at the background mat. I resized it and you can see how beautifully and accurately it cut the little circles.

GEDSC DIGITAL CAMERA
Here is one last look at the layout. Again, all of the vibrant papers are from the DCWV Chick Chat Stack.

Supplies Used
Craft Room Cut N' Paste Sketches:
Dreamy Day, Life Is Good and My Family
ALL FREE Files from Pazzles for National Scrapbook Day!
Blue Bazzil Cardstock
Don’t forget to head over to the Pazzles Craft Room and grab all the freebies just click the home button and then scroll down to the different blog posts to grab each freebie. Plus you will want to stop by Pazzles each day to check out what each designer used for their “My Favorites” theme this week!
nsd freebies 800j

 As always, thank you so much for stopping by and sharing your crafty time with me. Be sure to stop back by tomorrow for another crafty project. Until then,

Don't Forget To Sign Up For My Newsletter To Receive 
The Subscriber Only FREEBIES and other exclusive info!


Mother’s Day Card With New SVG File Set

Happy Sunday crafty friends,
Happy Mother’s Day to all the Mother’s of the world. I created this card with one of the new file sets from PaperCraftingWorld.com.
GEDSC DIGITAL CAMERA
The finished size of the card is 4.25 x 5.5. I used patterned papers from the Craft Smith Company Blackberry Lemon Paper Stack.  I used my Pazzles Inspiration Vue to cut the frames and the base of the card. I love that my Pazzles Inspiration can cut such intricate designs!

GEDSC DIGITAL CAMERA
Here is an angled view. You can see that I also used some clear gems and some pearls to accent around the frames. I colored the clear gems with my shin han marker to give them a bit of color. I love this technique.

GEDSC DIGITAL CAMERA
Here’s a closer look at the flowers. They are rolled or twirled flowers that came with the cut file set. The paper for the flowers is also from the Blackberry Lemon Stack.

GEDSC DIGITAL CAMERA
Here is another view. You can see my stamping a bit better here. I used the Just Because stamp set and my thistle ink pad for the flowers and the sentiment. For the branches I used my cashmere ink pad. I like that this stamp set has a “left and right or mirrored image” branch. I matted the sentiment with some more of the same pretty paper from the Blackberry Lemon Stack and used some foam tape to give it just a bit of lift.

GEDSC DIGITAL CAMERA
Here is one last look at my card. I finished it off with a ribbon and bow. Very simple but very effective.


card flourished edge 4215 ppr cfj-450
Card Flourished 4215 Files Set. Features the card in portrait and landscape sizes.

Supplies Used
Card Flourished 4215 File from PaperCraftingWorld.com
Craft Smith Company Blackberry Lemon Stack
Hobby Lobby Paper Studio Pearls
May Arts Grosgrain Ribbon

Well that about covers it for today. Be sure to come back tomorrow as I share a scrapbook layout. May all the females of this world have a wonderfully blessed Happy Mother's Day. Until then, 


Don't Forget To Sign Up For My Newsletter To Receive 
The Subscriber Only FREEBIES and other exclusive info!

Sending All My Love Card And FREEBIES


Happy Wednesday Crafty Friends,
Hope you are all doing well. Boy it has been a while since I have posted. I want to thank all of you for hanging in there with me. It has been a rough start to 2015 but I am hoping and praying that things will get better soon!  Today is my day to share over on the Pazzles site. So here is what I came up with:
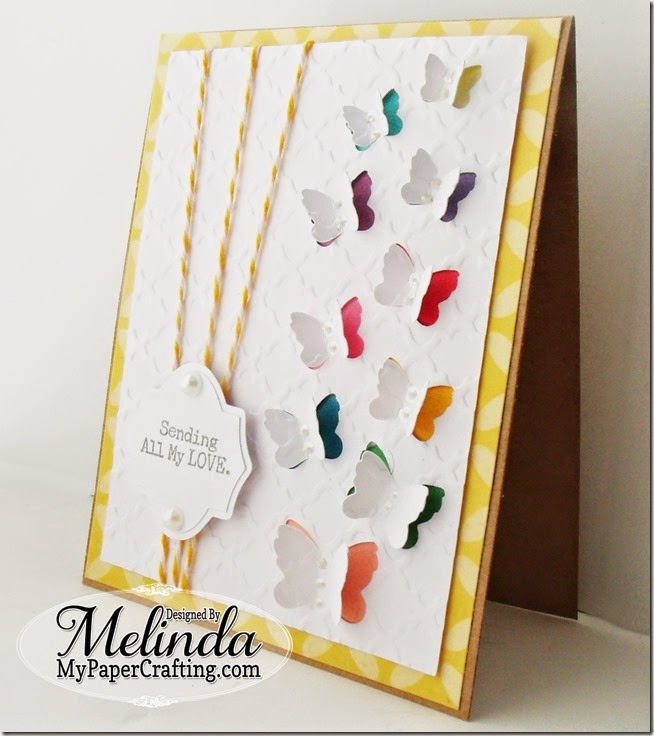
Here is a look at my completed card. I started by using my Pazzles to create the butterfly cuts on the mat. The card base is 4.25 x 5.5. It is a kraft cardstock base. The patterned paper is from the Craft Smith Co Painted Posies Paper Stack. I then used my quatrefoil embossing folder and my cuttlebug to emboss the white mat after I cut the butterflies. I also created the label tag on my Pazzles.  I used my April stamp set and my Whisper Ink Pad  to stamp the sentiment. I used some Buttercream twine from the Twinery and wrapped it around the mat. I used some foam tape to give the label a little lift. I finished off by adding a couple of pearl embellishments.

GEDSC DIGITAL CAMERA
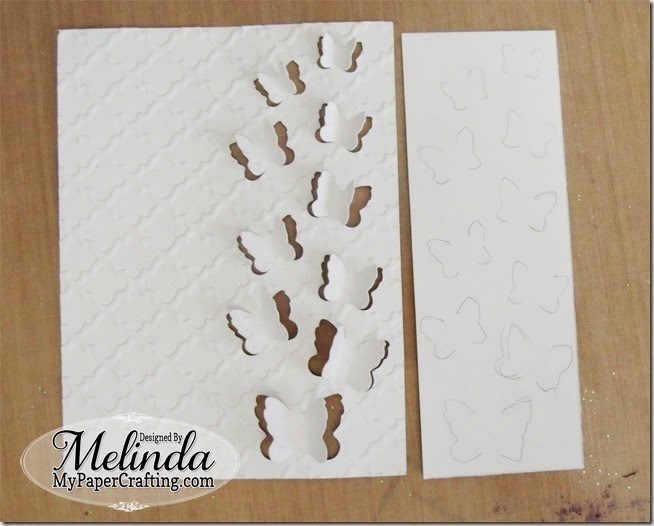
After cutting the butterfly mat I used a piece of paper and then used a pencil to outline where the butterflies are.

GEDSC DIGITAL CAMERA
I then used my various Shin Han markers to color in the areas of where the butterflies would be.

GEDSC DIGITAL CAMERA
After I colored the spots in, I adhered it to the back of the mat.

GEDSC DIGITAL CAMERA
Here is one last look at the final card. I also added some White Liquid Pearls to add some dots to the centers of the butterflies. If you belong to the Pazzles craft room the file I created is free for you. Be sure to head over there and download it.

Supplies Used
Butterfly Mat Cut File (Available At Craft Room)
Label Cut File Available At Craft Room)
Paper Studio Pearl Embellishments


For those of you that scrapbook or started paper crafting from scrapbooking, then you probably know that this past Saturday was National Scrapbook Day. Pazzles had a wonderful day of activities lined up as well as some fantastic freebies that you can use to join in on their challenges. You have to be a craft room member, to join the challenges to win prizes, but you can setup a FREE Account. Head over to the CRAFT ROOM HERE and then you can download the freebies for a limited time AND join the challenges. The freebies will be found on each blog separate blog post. Just click the read more buttons by each post and then you can download them. They have ALL their files in .WPC format for Pazzles users as well as SVG format for other machine compatibility.

Well that about covers it for today. Be sure to grab those freebies while they are available. As always thank you so much for stopping by. Until the next time,


Don't Forget To Sign Up For My Newsletter To Receive 
The Subscriber Only FREEBIES and other exclusive info!

15_04

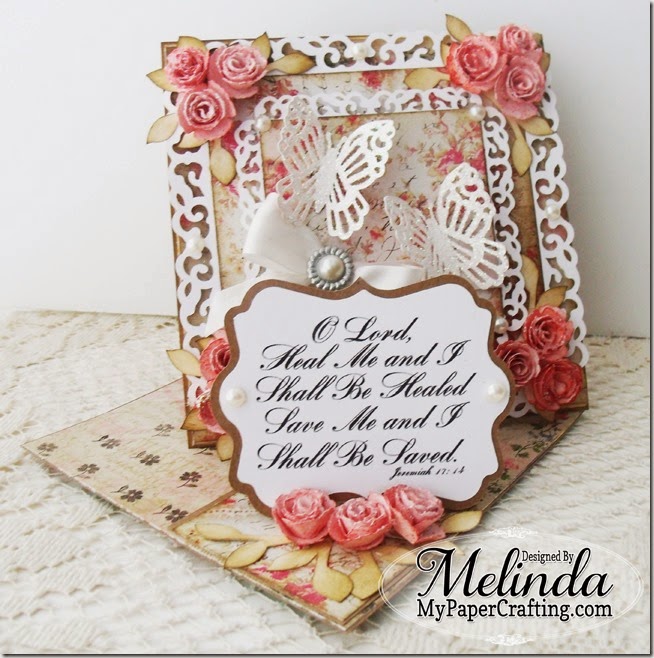
Elegant Rose Corner Card

Hello crafty friends,
Hello crafty peeps. Today I am sharing a card I created for my Pazzles design team. Our task was to create a “one of a kind” card.
GEDSC DIGITAL CAMERA
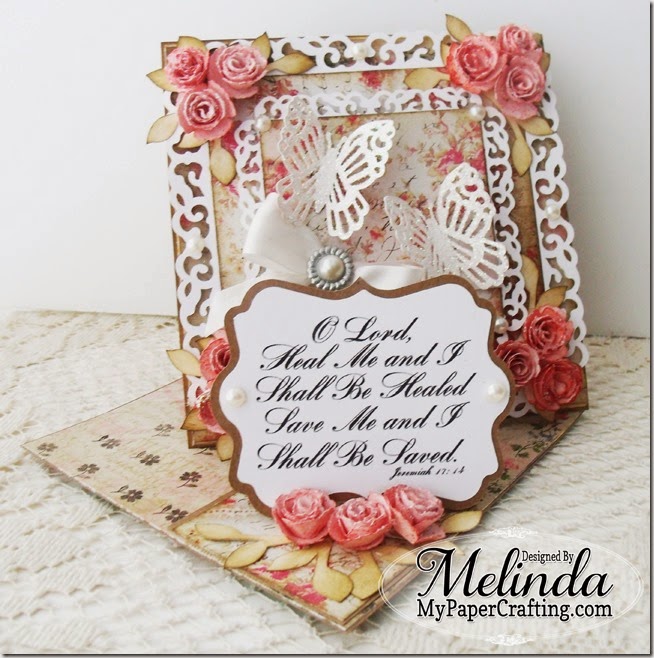
I started by heading over to the Pazzles Craft Room and picked the Twisted Easel Label card file. I cut the base and the label with  kraft cardstock. I then used printed paper from the Paper Studio paper pack. I then created the frame edges that I used and cut them in white cardstock and made them in two sizes. I then used more of the patterned paper for mats. I also used some foam tape to give the mats some lift from the base.
GEDSC DIGITAL CAMERA
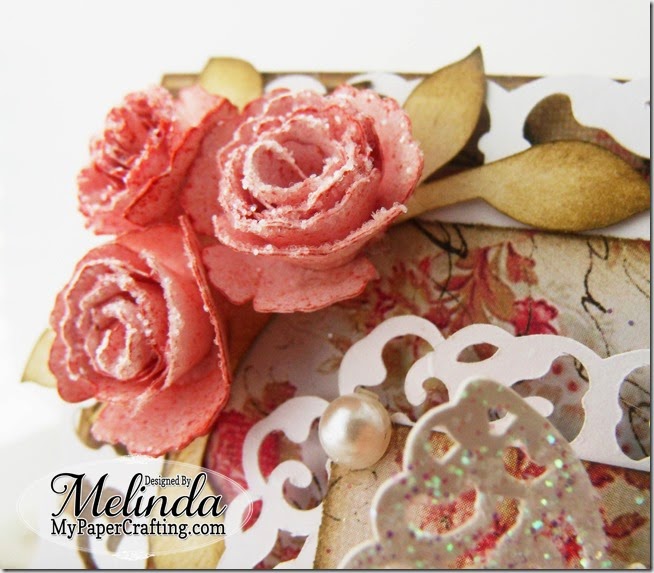
I then used some of the twirled flowers and cut them out in plain white cardstock. I then inked them with my Cranberry mini and Ruby mini ink pads to give them some color. I then used my glue gun to glue them after I twirled them into shape. I then dipped them in a little wet adhesive and then sprinkled some glitter on them.  I then created the leafy vines. I cut those out in white cardstock. I then used my Topiary (Green-Adventure Set)  and brown (Chocolate Basics mini set) ink pads to give them some color.

GEDSC DIGITAL CAMERA
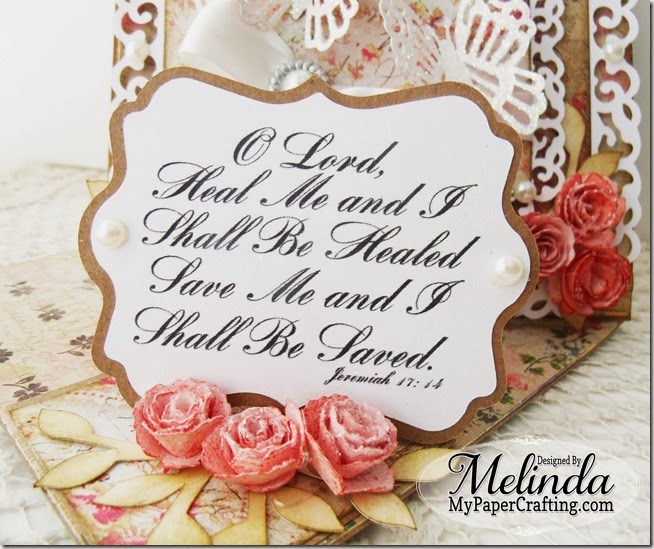
I then turned to my little label and then did a print n’ cut after I typeset the scripture sentiment. I then cut it out and the bottom layer. I then added some ribbon and a bow.

GEDSC DIGITAL CAMERA
Lastly I cut out a few butterflies and then I applied some glue and some fine glitter to them.  I would definitely say this is a one of a kind and a labor of love.


GEDSC DIGITAL CAMERA
Here is one last look at my finished card.  Truly a one of a kind, I enjoyed making.

Supplies Used
Pazzles Craft Room Square Twisted Easel Label Card
I created the following files:
Flourished Vine Frame
Raggedy Edge Twirled Roses
Vines
Butterflies
Cranberry Mini Ink Pad (Adventure Set)
Ruby Mini Ink Pad (Whimsy Set)
Topiary (Green-Adventure Set)  
Brown (Chocolate Basics set) 
Kirby Teesdale Paper Studio Paper Pack
Paper Studio Pearls
Stampendous Ultra Fine Glitter
Paper Studio Pearl Brad
White Satin Ribbon

Well, that about covers it for today. Thank you so much for stopping by and sharing some of your crafty time with me. I appreciate it so much. Until the next time,


Don't Forget To Sign Up For My Newsletter To Receive 
The Subscriber Only FREEBIES and other exclusive info!