14_02

Love Struck Layout - Cricut

Hello crafty friends,
Today I am sharing another layout I had created with a valentine’s –love theme.

Here is a view of the entire layout. I actually used my cricut for several of the elements. I had made a version of this layout a LLOOOONG time ago for a class I taught and as I was going through my “valentine” stuff, I found my extras bag of goodies and decided to freshen it up. The majority of it was created with cuts from my various cricut cartridges.


The Love Letters were from the Mini Monograms Cartridges.
The Struck Letters were from the Base Camp Cartridge.


The Wings, Hearts arrow and sash from the Paper Doll Dress Up Cartridge
The Scallop Circles were from the Art Philosophy Cartridge.
The bear was from the George and Basic Shapes Cartridge. With the exception of the arms. Those were hand drawn at the time. The background paper was from the Bo Bunny Oh La La Cupid Collection. The Black and White Polka Dot Paper was from Pebbles, Inc. Basics Stack from Hobby Lobby.

I used the following inks:

This bear was made right around the time I created my first Cricut piecing. If you would like to see some of the other ones I have made, you can visit my gallery HERE.  I am working on making recipes for all of these, but it always seems to get pushed back. I am sorry about that, but will work to get it done soon.

Products Used To Complete This Project
clip_image001
Expression
clip_image002
George and Basic Shapes
clip_image003
Mini Monograms
clip_image004
Base Camp
clip_image005
Art Philosophy Cartridge
clip_image006
Pebbles Dry Decorator Chalk
clip_image007
Enchantment Ink Pad Set
clip_image008
Whimsy Ink Pad Set
clip_image009
Adventure Ink Pad Set
clip_image010
Basics Ink Pad Set
clip_image011
Tombow Adhesive
clip_image012
Foam Tape
clip_image013
White Chalk Marker

Additional Products Used
Red, Black, White, Brown, Tan and Pink Bazzill Cardstock
Misc. Black and White Polka Dot Ribbon

Well, I think that about covers it for today. Don’t forget to visit Saturday’s post for the links to the freebies and be sure to come back tomorrow as I share another fun and hopefully inspiring project! Until then,


Happy Belated Valentine's Day Card and Some Freebies

Hello crafty friends,
Happy Sabbath Day. Well, I had this post ready for yesterday, but....due to some computer and software issues, I wasn't able to get it to post...yeah...not a fun technology day yesterday....so here is my post a day late.....

For those that celebrate Valentine’s Day, I hope you have a wonderful day filled with great expressions of love by family and friends. May you see the beauty in all that is around whether it be sunshine or 10 feet of snow. May God’s goodness and love towards each of us be seen and felt. Today I have a card I am sharing that you can pretty well duplicate for FREE. Here it is.


Here is a look at my complete card. The base is a 5.5 x 5.5 square out of kraft cardstock.
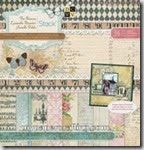
I cut a dark gray mat and then the argyle patterned paper is from the DCWV Primrose Stack….gorgeous stack of papers. Then the label shape is from the FREE 2014 labels cut file from Pazzles. Link for the freebie is below. I took off the 2014 numbers and then added a few layers using the outline tool. For the last layer I simply used the scalloped tool and it made scallops in a snap! The other two mats were cut out of pink cardstock and then out of some floral patterned paper again from the DCWV Primrose Stack.
The other label the cupcake digi sits on is also a free label in that same file set. Once again I removed the 2014 numbers and then cut it out of some vintage newsprint paper from the same DCWV Primrose stack.

Here is a side shot showing the close up. I inked the edges of the pink and floral mat with some Cotton Candy ink from my Adventure Ink Pad Set. I then used some Saddle ink from the basics ink pad set around the newspaper print label and then also went back over it with some whisper from the basics ink pad . I wanted to knock back the warm tone that just the saddle ink created. I then used my Copic Sketch markers to color in the cupcake image. I used:RV11, V000 for the cupcake top BG10 and Woo for the bottom. I did ink the edge of the cupcake image with my whisper ink pad.


Here is one more angled shot. I added foam dots to the scalloped layer and to the newsprint label layer. I wanted to give the card a little lift and give it some dimension. Don’t you just love that argyle print paper. It has a coated, glittered finish which just makes it perfect. I love that the glitter doesn’t shed either! Links to the freebie files are below.


The free files


This is the Pazzles Craft Room Free File. 
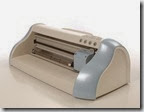
You can head over there and grab it. Be sure to tell them I sent you AND sign up for the free newsletter about the amazing new machine they have designed….the Pazzles Vue….Man oh man, I am hoping and praying I can get my hands on one of these!


Here is the second free file
to go download this from PaperCraftingWorld.com. It will be free through 2-20-14.
Please note: the shopping cart will reflect a price of .99 but will be free at check out during this period.


Products Used To Complete This Project
pazzle1_thumb_thumb
pazzles inspiration
dcwv-primrose-stack-200_thumb_thumb
DCWV Primrose Stack
have-a-sweet-day-cupcake-ppr-ds2g-20[2]_thumb
Have A Sweet Day Cupcake Digi Stamp
2014-labels-2004[2]
2014 Labels Pazzles Craft Room Cut File
Z2501-adventure_thumb_thumb
Adventure Ink Pad Set
Z2503-basics_thumb1_thumb
Basics Ink Pad Set

Additional Products
Kraft, Black, White and Pink Cardstock
Misc. Ribbon From Michaels
Copic Markers: RV11, V000BG10 and Woo 


I think that about covers it for today. Be sure to stop back by tomorrow for another fun project. Until then,

Heart Breaker Scrapbook Layout

Hello crafty friends,
I wanted to share a layout I recently created with some files available at PCW
heart breaker boy layout-450-mpc
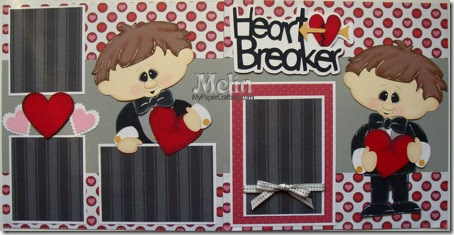
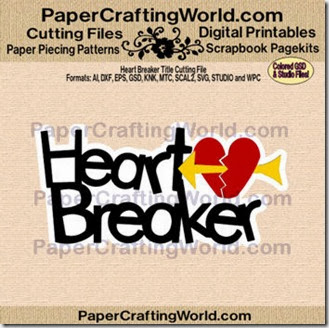
Here’s a look at my completed layout. I used the Heart Breaker title and or the Heartbreaker QT P Boy LO Set files from PCW.

heartbreaker qtp boy lo cf-325


heart breaker title-cf-350


GEDSC DIGITAL CAMERA
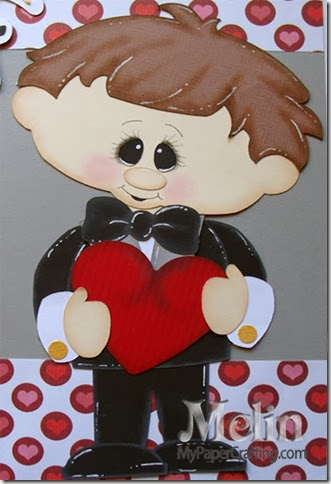
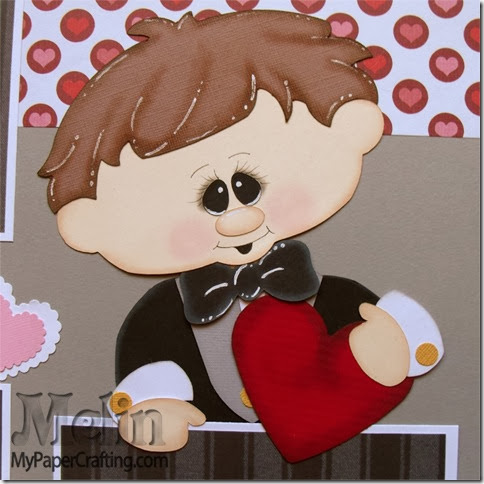
Here is a closer look at the cute little boy. He is wearing his tuxedo and carrying his heart. I used Whisper ink from the basics ink pad set  around the edges of all his black pieces as well as the gray and white pieces.. I used the Crème Brulee ink from the Whimsy Ink Pad set for the flesh pieces and the Saddle Ink from the basics ink pad set for the hair. I added in some dry decorator chalk on his hair as well as the facial features and then used my fine tip black pen for the eye lashes, brows and mouth. I then finished off the die cuts by adding some doodles with my white chalk marker.

GEDSC DIGITAL CAMERA
Here is a closer look at the little QT Patootie boy topper paper piecing. Once again, I used my ctmh inks as well as some dry decorator chalks to add the facial features to his face. I also used my chalk marker for the extra doodles on the various pieces as well as the glint for the eyes.  If you are unfamiliar with how to do these “faces” simply CLICK HERE for my tutorial. I did also use my black ink from my basics ink pad set for the red heart and also some of my dry decorator chalk for a little extra dimension on the shading of the heart.

Products Used For This Project

pazzle1
Pazzles Inspiration
heart punch
Fiskars Scalloped Heart Punches Medium and Large
american crafts haute elle 2 grosgrain ribbon
AC Haute Elle Grosgrain Ribbon
160069-all seasons II
Paper Studio All Season II
1772-glue dots
Glue Dots
Z553-chisel tip glue pen
Chisel Tip Glue Pen
Z1151-foam tape
Foam Tape

Additional Supplies
Dry Decorator Chalks
Fine Tip Black Pen
Black, Grey, White, Pink and Red Cardstock
Recollections Papers

I have also made this into a page kit. I think there are just a few left, so if you're interested, be sure to head over to Page-Kits.com and pick yours up.

Well that's it for now. I may be back a little later today with another quick post and special announcement :-)
Until then,

Fancy Pants Love Story Layout

Hello crafty friends,
It is another terrific Tuesday and I am here to share a layout I made. I got some pics of my brother and his youngest daughter recently attending their annual father/daughter dance. So I thought this would make the perfect Scrapbook Layout.

dan and allie layout-480
Here is a view of my entire layout. I used patterned paper from the Fancy Pants Love Story collection. All of the beautiful patterned papers as well as the sicker letters and the sticker heart are included.


heart die cuts closeup-480
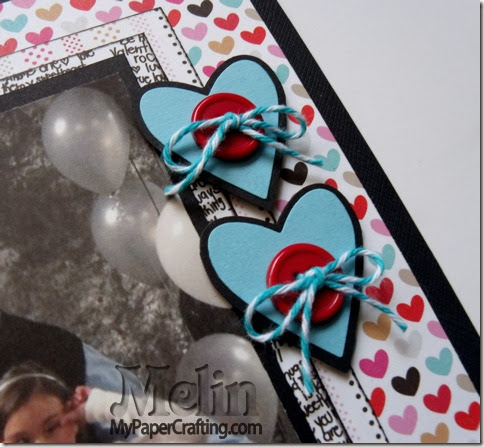
Here is a closer look at the two little heart die cuts. These are 2x2 heart die cuts from Quickutz. I simply cut them in black and aqua and then added a red button and some twine. I also used my foam dots to give them a little lift.


allie ltr cu-480
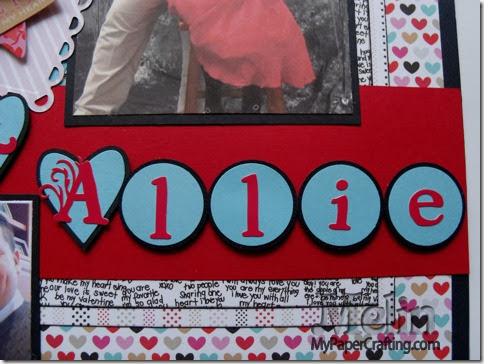
Here is a closer look at the lettering. I used the Quickutz 2x2 heart die for the first letters and then used the 1 1/8th and 1 1/4 circle punches. Again, I used some foam dots to give them a little lift. I also inked the two larger background mats with some black ink. I wanted to give the edges some definition without the weight of an additional mat.


heart scallop cu-480
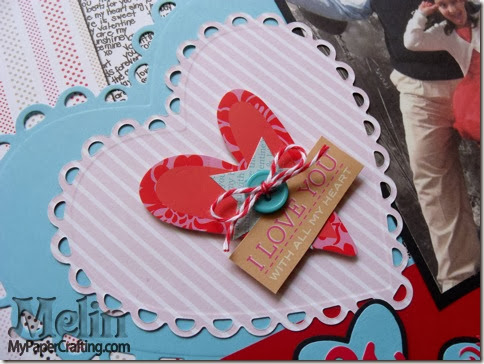
Here is a closer look at the large scalloped heart Quickutz die cuts. I used my cuttlebug to cut them out of some of the patterned papers. The red heart was a sticker as well as the star from the Fancy Pants Love Story set. The I love you sentiment was cut from one of the pieces of paper. I just added a button and some twine for a little extra touch.

Products Used For This Project
qk-heart_thumb
Quickutz 2x2 Heart Die

squeeze_thumb
Quickutz Squeeze
fancy-pants-love-story_thumb
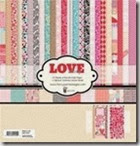
Fancy Pants Love Story Paper Set
doodlebug-twine-assortment
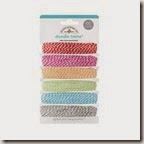
Doodlebug Take Note Twine Asst.

ek success circle punch one inch
EK Success 1 1/8 and 1 1/4 circle punches
Additional Products
Black, Red and Aqua Cardstock
Black Ink
Miscellaneous Buttons

Well, that about covers it for today. Don’t forget to head over to Scrapyland.com for all your crafty supplies! As always, thank you so much for sharing your crafty time with me. Until next time!