14_02

Fancy Pants Love Story Layout

Hello crafty friends,
It is another terrific Tuesday and I am here to share a layout I made. I got some pics of my brother and his youngest daughter recently attending their annual father/daughter dance. So I thought this would make the perfect Scrapbook Layout.

dan and allie layout-480
Here is a view of my entire layout. I used patterned paper from the Fancy Pants Love Story collection. All of the beautiful patterned papers as well as the sicker letters and the sticker heart are included.


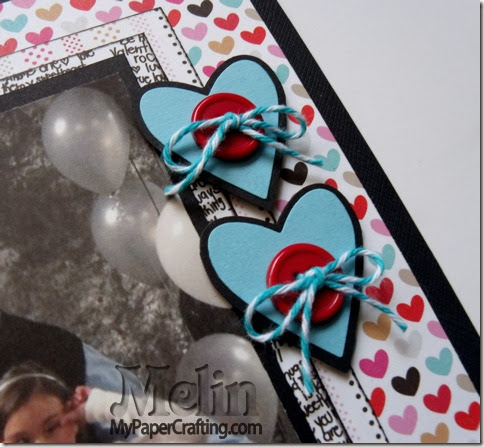
heart die cuts closeup-480
Here is a closer look at the two little heart die cuts. These are 2x2 heart die cuts from Quickutz. I simply cut them in black and aqua and then added a red button and some twine. I also used my foam dots to give them a little lift.


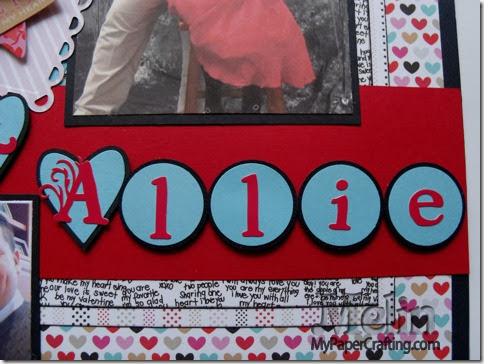
allie ltr cu-480
Here is a closer look at the lettering. I used the Quickutz 2x2 heart die for the first letters and then used the 1 1/8th and 1 1/4 circle punches. Again, I used some foam dots to give them a little lift. I also inked the two larger background mats with some black ink. I wanted to give the edges some definition without the weight of an additional mat.


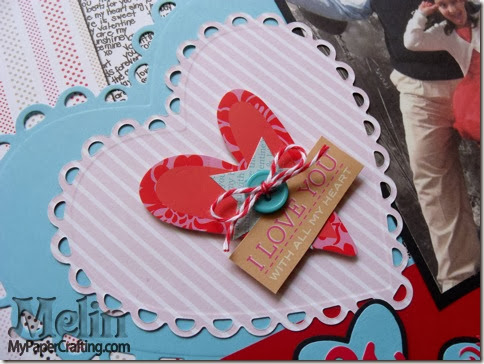
heart scallop cu-480
Here is a closer look at the large scalloped heart Quickutz die cuts. I used my cuttlebug to cut them out of some of the patterned papers. The red heart was a sticker as well as the star from the Fancy Pants Love Story set. The I love you sentiment was cut from one of the pieces of paper. I just added a button and some twine for a little extra touch.

Products Used For This Project
qk-heart_thumb
Quickutz 2x2 Heart Die

squeeze_thumb
Quickutz Squeeze
fancy-pants-love-story_thumb
Fancy Pants Love Story Paper Set
doodlebug-twine-assortment
Doodlebug Take Note Twine Asst.

ek success circle punch one inch
EK Success 1 1/8 and 1 1/4 circle punches
Additional Products
Black, Red and Aqua Cardstock
Black Ink
Miscellaneous Buttons

Well, that about covers it for today. Don’t forget to head over to Scrapyland.com for all your crafty supplies! As always, thank you so much for sharing your crafty time with me. Until next time!

Scrapbook SVG Layout Moose Be Love

Hello crafty friends,
Welcome to another Fabulous Friday SOUS Die Cut Challenge! Our challenge this time is all about something sweet! It is no coincidence as one of the “sweetest” days of the year is coming up!  When you think of Valentine’s day, you inevitably think of Chocolates, candy and sweet treats! So here is what I came up with!

Scrapbook Layout Using SVG Paper Piecings
Moose Be Love

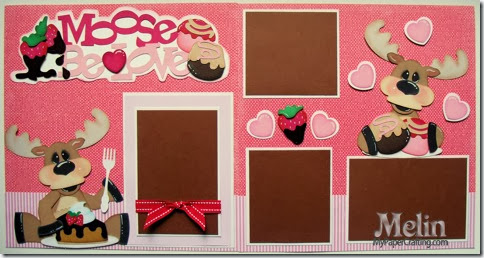
Paper Piecing Scrapbook Layout Moose be love SVG Cut File layout
Here is a view of my entire scrapbook paper piecing layout. I love the “pun” title. I used the Chocolate Moose SVG cut file from PCW.

SVG Paper Piecing chocolate moose die cut file


SVG Moose Truffle Paper Piecing Cut File
Here's a closer look at the little chocolate moose topper. Holding his little truffles-chocolates.


Here's a closer look at the strawberries on the title. I used some liquid glass to give the chocolate some shine.


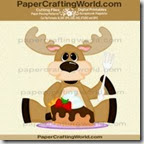
Here is a closer look at the little moose getting ready to enjoy his chocolate covered pie!


Paper Craft SVG Pie Die Cut
Here's a closer look at the pie. Again, I used some liquid glass to really make the chocolate look extra yummy!


Products Used To Create This Project
pazzle1
Pazzles Inspiration
chocolate mousse ppr-cf-200B
Chocolate Moose CF
Z2501-adventure
Adventure Ink Pad Set

Z2503-basics
Basics Ink Pad Set
enchantment ink-140
Enchantment Ink Pad Set

whimsy ink pad
Whimsy Ink Pad Set
1514-tombow adhesive
Tombow Adhesive

Z1151-foam tape
Foam Adhesive

Z553-chisel tip glue pen
Chisel tip glue pen

Z1767-chalk marker
Chalk Marker
liquid glass
Liquid Glass


basic 10
Pebbles Basic Chalks
Additional Products Used 
Black Fine Tip Pen
White, Black, Red, Pink Brown, Medium Brown and Dark Brown Cardstock
MME Abbey Road Cardstock Designer Paper
Recollections Patterned Papers

I did also make this layout into a kit. You will be able to purchase it starting on Sunday on Page-Kits.comNow head over to SOUS and check out what the rest of the design girls created. Don’t forget, our challenges now have sponsors, so play along and you will be entered to win!

As always, thank you for sharing your crafty time with me. Until tomorrow,

Die Cut Heart Easel Card

Hello crafty friends,
Today I am sharing a project for my Scrapyland.com DT. I created a heart shaped easel card. I made this card using all “manual” dies. Here is a photo of my completed card.


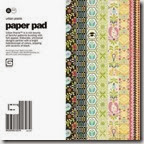
All the papers I used for this card with the exception of my Kraft and White Cardstock came from the Basic Grey Urban Prairie 6x6 Paper Pad.

Shaped Die Cut Card Tutorial
I started by selecting some kraft paper. I measured to make sure I had a piece big enough to be folded and yet made room for the whole die. I did this with the two largest dies in the pack.


I folded the paper and scooted the fold to where it was just shy of the top two scallops. By leaving the top two cut lines exposed, it allowed the “fold” to stay in tact. This created the card body.


Here is a closer view showing how the paper looked still in the die. You can see the fold on both scallops are within the scallops. I had no problem cutting the cardstock with the "double thickness" I used my Cuttlebug for this project.


Here is what the two “card” bases looked like. I made one smaller so I could layer it on to the larger one. It will make sense when you see the rest of the photos. Also making the bases on the kraft cardstock gave the card a good sturdy base. 


Because I wanted to create an easel card,  I had to create a fold in one of the flaps. I used my Martha Stewart Score board to line up my card so I could get a straight line.


Here are several of the dies. The die cut set comes with 5 sizes of the heart shaped dies. It makes it really easy to find the size you need.


Here is a closer look at the top heart. I hand cut the eyelet part off the blue die cut pieces and layered them onto the white heart. I used the White Opal liquid pearls to go around the middle heart.


Here is a closer look at the bottom heart. I used foam dots to give the larger heart some lift so the card would stay opened.


Here is a shot of how the card looks closed.


Here is a view of the top heart “card” open. I left it blank so I could write my personal note on the white cardstock.


Here’s one last look at the card opened.


Products Used To Complete This Project

white opal pearls-155
White Opal Liquid Pearls

18283036hr
MS Butterfly Punch
Additional Supplies
White and Kraft Cardstock
Martha Stewart Score Board

Hope this inspires you to look at your dies in a different way. With some of your shapes you could make some very nice card bases!  Don’t forget to swing over to Scrapyland.com  to check out all of the amazing new releases now in stock!!!