13_10

Ric Rac Sunflower Ribbon Card

Hello crafty friends,
I wanted to share a card I created over the weekend and finished up this morning.
It features the DCWV Autumn Melody and Spiced Cider paper stacks and a cute May Arts Ric Rac Ribbon Sunflower.
Here it is:
I used the new Layered Label Card SVG cut file set from PCW.
It will be released at the end of this week!


Here is a closer look at the side view of the card. I used plenty of foam adhesive to give some of the layers some lift.  I used the Saddle mini ink pad to edge my yellow cardstock and my patterned paper.


Here’s another side shot to show the cute Stamped sentiment from the CTMH Fall Harvest Seasons & Nature Stamp Set. I used the Olive ink pad from the Enchantment ink pad set to stamp out the sentiment. I inked the edge of the sentiment cardstock in more of the Saddle ink from the other set.

RIC RAC Sunflower Ribbon Tutorial

Now for the quick tutorial on how to make this super cute Ribbon Sunflower
You will need:
Needle and thread
Piece of cardstock and Circle punch
Hot glue or other strong adhesive.

Start with a piece of the May Arts Zig Zag Ribbon. It is the larger ribbon. Make sure you cut out a piece that has three “peaks” and a little extra on each side. I cut it at the lowest point of the dips on either side of the third peak. See pic.


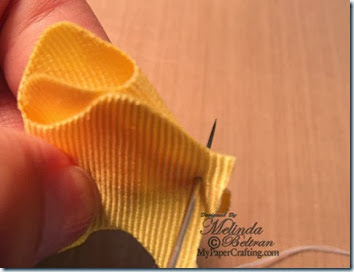
Fold one side over so the the highest point more or less lines up with the lowest point on the other side. Side Note: You can apply a little bit of adhesive along the bottom but keep in mind you have to use your needle and thread and it may not be easy to get them through the adhesive. I used it on this one simply to be able to take the picture.


Now fold the other side over in the same manner as before. This will create the point of the petal.

start sewing
Taking your needle and thread, start in the “front” of the petal and pull through to the back. I am using white thread here for demonstration purposes. But you would probably want to use a thread similar in color so that it blends better Smile


Continue sewing in and out. Make sure you “grab” the back of all the layers as you go straight across. The main point here is to end on the other side with the extra or last part of material on “top” of the needle.


This is a front view of the stitched petal. The idea being that your thread ends out on this side of the petal, on both sides.


Now pinch the “petal” and wrap the thread around the bottom. Make sure to start with your thread going down and around. This will make the very ends sorta “fold” back. You want this so that the fabric will easily “open” when you go to “fluff” your petals out. The other way will cause your petals to kind of close in on themselves. Simply wrap the thread and tie it off.


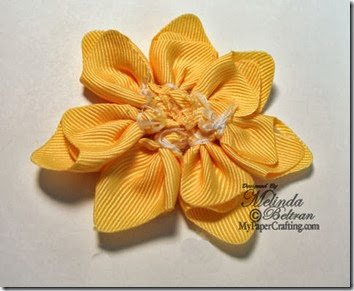
Here is a shot of one of the finished petals.
Repeat the above steps to create a total of 7 petals. Once your petals are done, you will need something to adhere them to. I used a piece of cardstock and cut out a 1.25” circle. I then used my hot glue gun and adhered the petals to the circle base.


assembled petals-480
Adhere the petals “face up” and one next to another.  Lastly you will need to cover up the mechanics that are showing in the center.


I used a large button and tied some burlap cord in the center. I took my finger and stuck it into each petal to give them some “shape”. You can also see that I wasn’t precise about making sure each looked the same. Some have the side peaks showing a little more and I think it looks good that way. Gives the illusion of more petal layers, etc.


Here is my finished May Arts Ric Rac Ribbon Sunflower mounted onto my card.
I used the following products to create this card
pazzle1
Pazzles Inspiration
dcwv autumn melody stack
DCWV Autumn Melody
dcwv spiced cider
DCWV Spiced Cider
card label layered 1013-ppr-cf-200
PCW Label Layered Card 1013 SVG cut files
330-27-768x1024
May Arts Ric Rac Ribbon
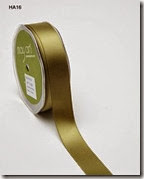
HA-16 7-8 satin ribbon
May Arts Olive Satin Ribbon
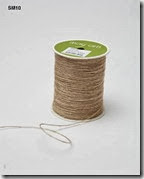
mayarts-SM-10-burlap cord
May Arts Burlap Cord
Z2502-enchantment
Enchantment Ink Pad
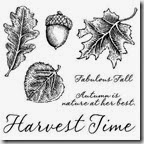
C1504_fall harvest stamp set
CTMH Fall Harvest Stamp Set
ranger cinnamon stickles
Ranger Cinnamon Stickles
Additionally, I used
Yellow and Brown Bazzill Cardstock
Bo Bunny XL Brown Button


I am entering this card into the following challenges:
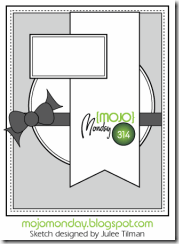
Mojo Monday: 314 Sketch

Thank you once again for stopping by and sharing your crafty time with me!
2013 fall winter melsig-450

DCWV Primrose Stack Pazzles WCMD Easel Card

Good afternoon crafty friends,
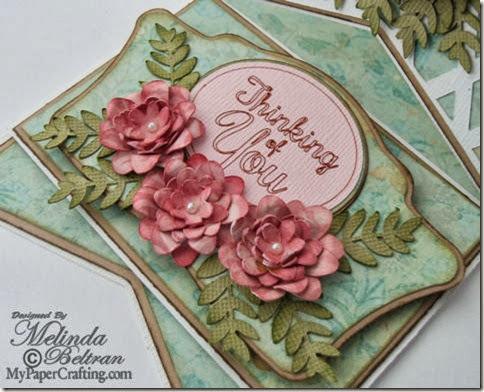
Here is my card for the Pazzles World Card Making Day Challenge.  I was tasked with using a sketch and coming up with a card. I used the wonderful DCWV Primrose Stack paper for this card. Along with the sketch we had to use at least one of the sentiments included in the file, Two patterned papers and at least three gems, buttons, brads, etc.
dcwv primrose stack svg rose easel card 480
Here’s a look at the card I created. I took the file from pazzles and created an easel card with it.

dcwv primrose stack svg rose easel card2 480
Here is a side look at the card.
dcwv primrose stack svg rose card 480
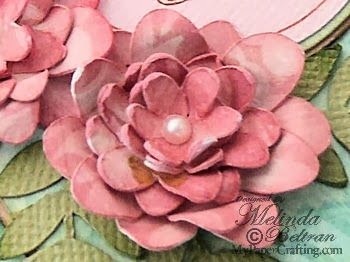
This is a look at what the card looks like “closed”. I created the pretty flowers from a piece of designer paper from the DCWV Primrose Stack. I inked the edges of the flower with my Hollyhock Ink Pad and My Blush Ink Pad.

dcwv primrose stack roses card 480
Here is a closer look at the flowers. I used some tiny pearl gems from Recollections. I inked the little fern leaves with my Olive Ink Pad

dcwv primrose stack pazzles pen tool 480
This is a closer look at the pen work. I used the new pazzles ink pen to “write” the sentiment. I used my Brown micro pen.

Here is what I used to create this card.
The following are the products I used to create this project.
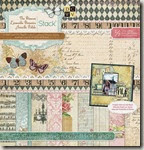
dcwv primrose stack
DCWV Primrose Stack
wmcd-sketch-200
Pazzles sketch
layered yellow flower-200
ElegantLayeredFrame200
fern leaf-200
Z2502-enchantment_thumb1
Enchantment Ink Set
Olive Ink Pad
z2106-blush
z2128-hollyhock
Additional Products
Kraft, Pink and Green Cardstock-Both Bazzill and American Crafts.
Pink Ribbon and Pearl Gems by Recollections
Be sure to head over to Pazzles.net and check out all the fun stuff going on!
Thank you so much for sharing your crafty time with me!
2013 fall winter melsig-450

World Card Making Day….Sneak Peek

Good morning crafty friends,
I have a card to share with you today for World Card Making Day…BUT, I can’t share it until it goes live on the Pazzles.net site…So I wanted to give you a quick sneak peek and remind you to “tune in” to the fun! Pazzles is having a party!
Pazzles-WCMD2013

So Here is my sneaky peek
dcwv primrose stack flower pazzles sneak peek-350

Be sure to head over to pazzles.net beginning at 2pm MDT time. Free SVG files every hour, challenges and a live class by Ms. Christine! Then make sure to head back over here to see my card with details, etc.

See you in a little while!

Happy Halloween Layout

Hello crafty friends,
Today I am sharing a layout I created for the Pazzles craft room October challenge! The theme for the challenge this month is….Halloween! So here is what I came up with.

The two cutie patooties in the photo are my son and daughter when they were much younger. We don’t celebrate Halloween anymore, but even when we did, I wasn't on board with all the spooky and scary stuff, so the kids always had FUN and or CUTE costumes.


Here is a closer look at the cute little bear in pumpkin suit. He was created by combining the lil’ pumpkin file with the teddy bear file.


Here is a closer look at my stash o’ candy…lol!


Here is a closer look at the cute banner with lettering. I used foam adhesive on the banner and on the lettered squares to give them some dimension. The Doodlebug Sprinkles were a perfect compliment and they went on as easy as peel n’ stick!!!!


The following are the products I used to create this project.
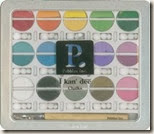
pazzles chalk easy tool 
basic brights
Basic Brights
Chalk Set
teddy bear-200
Pazzles
Craft room File
Pazzles
Craft room File
lil_pumpkin-200
Pazzles
Craft room File
zigzag-ribbon-200
Pazzles
Craft room File
pennantbirdies-200
Pennant Birdies
Pazzles
Craft room File
scallop-circles-200
Scallop Circles Pazzles
Craft room File
candy bag-200
Pazzles
Craft room File
candy2-200
Pazzles
Craft room File
gum drops-200
Pazzles
Craft room File
Pazzles
Craft room file
candied apple-200
Candied Apple
Pazzles
Craft room file
4003 day to day sprinkles
3898-halloween parade
Doodlebug Halloween Parade
3899-treatbag
Doodlebug
Treat Bag
Additional Products
Red, Yellow, Orange, Green, Purple, Black, Brown and Cream Cardstock-Both Bazzill and American Crafts.
Celebrate It Orange Polka Dot Ribbon


CHALLENGES
I am entering this layout in the following challenges:
Pazzles Craft Room Monthly Challenge: October-Halloween
Crafty Boots: Sweet Treats Challenge
Crafty Calendar Challenge: Bear on Project
Crazy For Challenges: Use A Bow
Created With Love: Halloween
Love To Create: Candy Inspired Challenge
Through The Purple Haze: Halloween
Time For Scrap: Halloween

Well, I think this about covers it for today. Thank you so much for sharing your crafty time with me!
2013 fall winter melsig-450png