13_06

Tag With Rosette Tutorial

Good morning crafty friends,
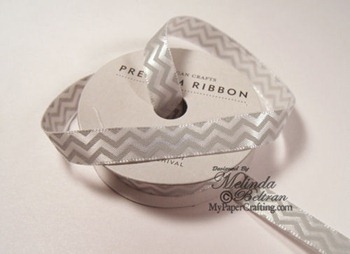
I wanted to share the details on how I made this tag. I created it for our Totally Tags n’ ATC’s Thursdays post a couple of weeks ago. It uses some great American Crafts Chevron Ribbon, some
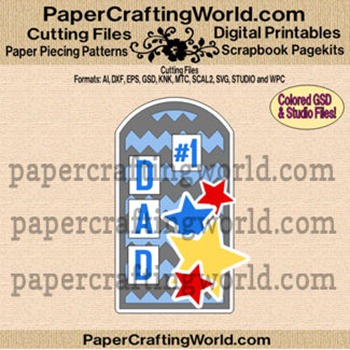
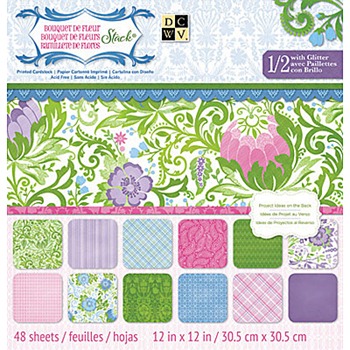
Die Cuts With A View Patterned Paper and an SVG Chevron Tag file from PaperCraftingWorld.com. Anyway, let’s get started.


Here is a look at the finished tag.


american crafts chevron ribbon tutorial-500
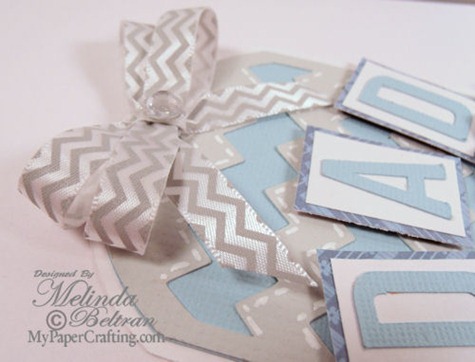
Here is a close up of the cute chevron ribbon bow.


star rosette closeup
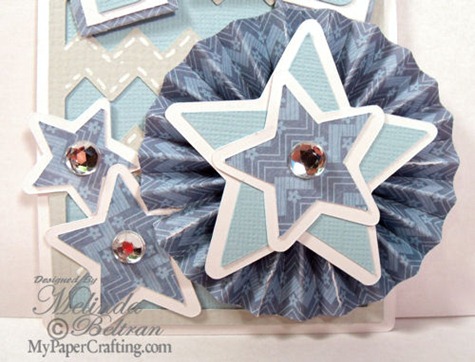
This is a close up of the stars and the “Rosette”


How To Create The Rosette
step one strip-500
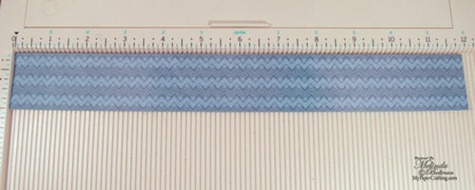
1. Start with a piece of paper 1.5” x 12”
You can change the 1.5 to whatever you like, just remember that
this number represents half the final circumference of your finished
rosette. So this finished one will be approximately 3”.

scoring quarter inch-500
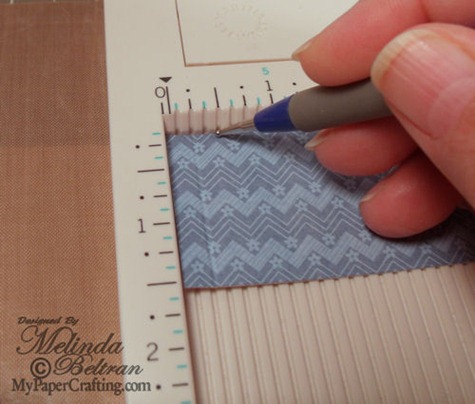
2. Using a scoring tool, score your strip every quarter inch beginning
with the first quarter inch mark. Go all the way across to the end.


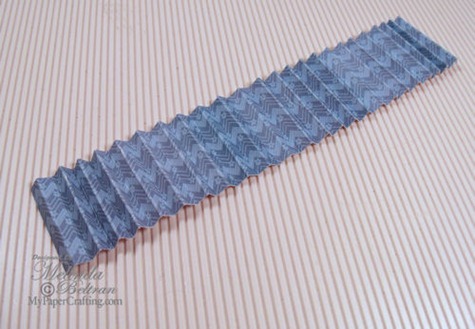
fan fold the rosette-500
3. Once you have scored all the way across, you will need to “fan fold”
at each score. Tip; start with the first quarter inch folded “down”
this will help with securing the ends later. See photo.

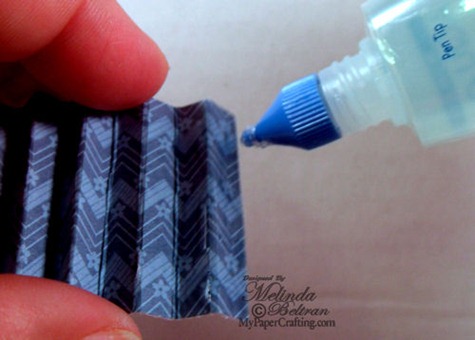
adding adhesive-500
4. Add a bead of glue to the first two scored “columns”

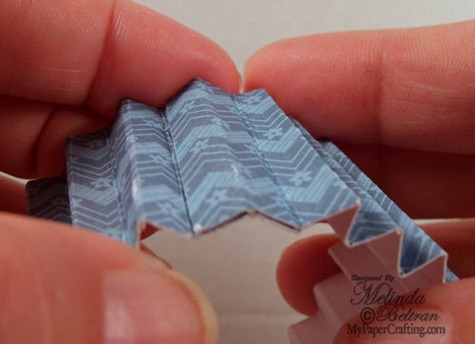
gluing together-500
5. Bring the two ends together and lay the last two scored “columns”
onto the first two that you put your adhesive on. I used a wet
adhesive to give it a good strong adhesion. You will want to use any
adhesive you have that will give you really good “hold”. Line up the
ends so they are flush and give them some time to adhere.


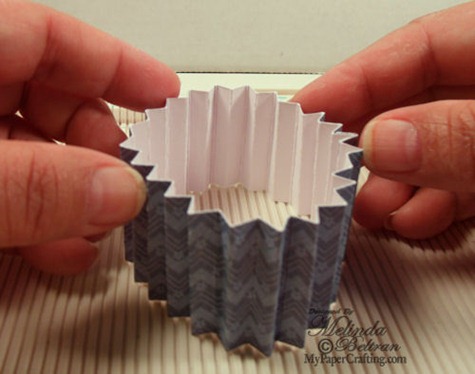
begin gathering-500b
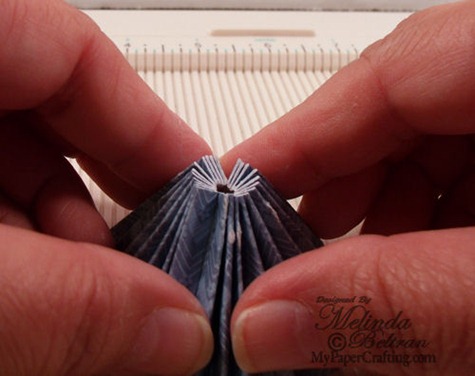
6. Once your seam is glued together, stand your strip “up”.
Begin to gather the top edge of the strip of paper together.

gather together2-500
7. Continue to gather your top edge until it is a nice tight gather.
Almost looks like a volcano…lol Smile

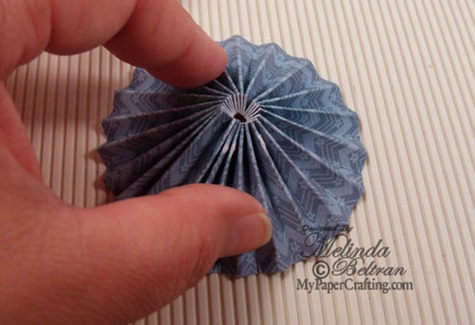
begin to flatten rosette-500
8. Once it is gathered, gently start pushing “down”. Be sure to apply
even pressure and you may also want to use a “flat” surface.
This will help your paper easily slide.


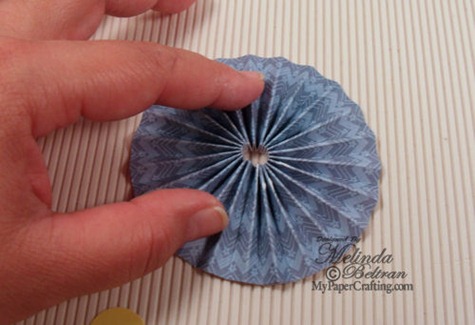
flatten rosette-500
9. Continue pushing down until your rosette is completely flat.


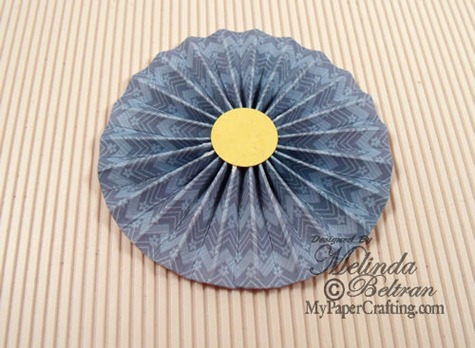
adhesive circle-500
10. I used a small circle punch to cut out a circle. I had adhesive on
one side of the circle. I applied the circle to the top. You can use any
type of embellishment here, (button, brad, etc.) you just need to make
sure you use something that will “touch” all the edges of the folds to
help keep the folds in place. I also applied an additional circle to the
bottom –other side of the rosette. This way, it will remain flat.

I realize this technique has been around the crafty community for
quite some time. But I also know that every day new crafters are
“discovering” these old techniques. So I decided to share my “how to”.


Again, one final look at my completed tag.

I used the following products to create this project.

tag chevron dad-cf-325

bouquet de fleur
American Crafts Chevron Ribbon
american crafts chevron ribbon-500
Bazzill Blue, Grey and White Cardstock
Foam Dots Adhesive
White Signo Gel Pen
Misc. Gems

That about covers it! Thank you for sharing
your crafty time with me!

Digi Desserts Fridaze

Good morning and HAPPY FIRST DAY OF SUMMER!!!
I hope you're finding time to craft now that summer is here.  Sometimes that becomes a bit tricky when the kids are out of school.
Let's get right to our Design Team projects.


PCW File Used:  New Every Morning


After Suzanne created the adorable card above, she decided to use the image for this layout.
Tune in next week for the second page of this 2-page layout.


  Details Post Coming Soon
PCW File Used: Basic Lattice Card CF Set (Coming Soon)
Thank You Sentiment DS Set (See Below)


FREE DIGI DOWNLOAD
Here is this week’s free digi. Be sure to grab it while it’s free (this week only)
NOTE: the image will show a price of $1.00 
but when you check out, it will be free during this link up.

Because we know what a busy time it is,
we are not going to have any link-ups for June.

 We hope you continue to visit every Friday because the DDF gals 
will continue to share projects using the fantastic 
Digital Printable Images from Paper Crafting World 
and of course have a FREE DIGI too!
-Larelyn and the MPC Digi Gals
- See more at: http://www.mypapercrafting.com/search/label/Digi%20Desserts%20Fridaze#sthash.pMNbnBTW.dpuf

Totally Tags n' ATC's: Sun

Good morning, Suzanne of Cricut Crafting Grammy. We are back on Thursdays to explore different themes, elements, techniques or embellishments. This week we are using a sun  on our tags and ATC's. There is no restriction on what tools are used to create these tags or ATC's. It could be a die cut machine, punches, stamps, etc. The sky is the limit. However if the Design Team uses Digis or SVG's they will be from Paper Crafting World. As a side note, if you don't know what an ATC card is, we have a definition at the bottom of our post.

I hope you will join us each Thursday here at My Paper Crafting for 
Totally Tags n' ATC's.

So let's see what all the designers have in store for you today. 
I hope you are like me and look forward to this post each week.  
Remember to click on the links to see more info about each project.


Cartridges Used:  Create A Critter - Pooh & Friends -Give A Hoot - Winter Frolic


Cartridge Used: Pooh and Friends


PCW Files Used: D7 Butterfly-Tag cf, Sunflower xl cf


PCW File Used: You're Sunthing Special Digital Stamp                               

PCW File Used: Tattered Edge Tag n' Sun CF (coming soon)


Sorry, No Vintage Graphic This Week :-(

We hope you were inspired to put a little "Sunshine" on your next project.

Be sure to come back tomorrow for another 
Digi Desserts Fridaze Link Up and another FREE Digi!
-Suzanne and the Totally Tags n' ATC Designers

CWC #139: Card Outreach


Happy Wednesday and welcome to our weekly "Crafts With Cutters" Design Team challenge.  This week the team is creating cards for team member Madison's "I Feel the Love" Project.  Madison started IFTL in June 2011 and has since collected over 1,500 handcrafted cards for folks in need of a little loving!

This month's recipients are Yvette and Santiago Villega, Jr.  In early September 2012, Yvette and her friend Lyanna Casares, along with the Villega's 6 month old son Mason, were struck by a drunk driver. The driver fled the scene and was later tracked down by the police. Mason sustained a fractured skull, a broken nose, and dangerous brain swelling.  Tragically, three days later Mason passed away.  

The Villega's are not only grieving the loss of their precious child, they are also having to deal with the criminal justice system as they fight for justice for Mason.  This month Madison is  asking for sympathy cards, thinking of you cards --anything appropriate for grieving parents. 

Here is what our Design Team created:

Cricut cartridge used:  Kate's ABCs


Cricut cartridge used:  Create-A-Critter 


Cricut cartridges used:  Florals Embellished and Plantin SchoolBook 


Cricut cartridges used:  Doodlecharms and Give A Hoot 


Cricut cartridge used:  Elegant Edges 


Cricut cartridge used:  Pink Journey 

Please consider creating a card for "I Feel the Love" Project!  Click here for more information about baby Mason and the Villega Family and where to send your card.

Thanks so much for stopping by and spending some crafty time with us today.  Don't forget to join us each Thursday for our Tags 'n ATC Thursdaze and Friday for our Digi Desserts Fridaze.

~ Jen and the MPC Designers