13_01

Winners Announced


Welcome to My Paper Craft World's
Craft With Cutters Challenge Winners


Today we would like to announce the winners of 
Challenge #117- Bundle Up Baby.  


Sarah and Sheena you can "pick up" your top chef buttons on the left column and proudly display them on your blogs. As the winners of this week's challenge, you will receive your choice of individual digi stamp or cutting file from Papercraftingworld.com

Please contact Madison at FunkyCards @Charter .net (no spaces) within two weeks to claim your prize.

This week Craft With Cutters is ready for winter as we create projects to celebrate the "Wintery Outdoor Fun."  You have until next Tuesday at midnight (EST) to complete your project.  To enter, link your project to the Craft With Cutters challenge.  You will be eligible for an individual cutting file or digi stamp from  Papercraftingworld.com.

Have a wonderful day!
~Madison - Prize Coordinator

CWC #118: Wintry Outdoor Fun


Happy Wednesday and welcome to our weekly "Crafts With Cutters" Challenge!  This week we're playing in the snow!  Our fabulous Design Team members have created projects featuring wintry outdoor fun, activities and scenery.  

Here is what they came up with . . . 

Cricut cartridges used:  Gypsy Wanderings and Winter Woodland


Cricut cartridge used:  Art Philosophy


Cricut cartridge used:  Winter Lace


Cricut cartridges used:  Joys of the Season, Lyrical Letters
and Cricut Craft Room Basics 


Cricut cartridge used:  Snow Day 


Cricut cartridge used:  Snow Friends


Cricut cartridges used:  Winter Woodland, George & Basic Shapes,
and Joys of the Season


Now it's your turn!  Link it up your "wintry outdoor fun" project for a chance at being this week's "Top Crafty Cutter."  Here are some guidelines:

  --> Must follow the challenge topic.
  --> Must be a NEW project for this challenge; no backdated posts, please.
  --> Must have a link back to this post on your blog.
  --> Must link your project through Inlinkz and not just your blog.
  --> Must use your Cricut in some capacity.
  --> Must have FUN!
  --> You may gladly combine challenges . . . we love to pile it on, too!

Thanks so much for joining us for our weekly challenge.  Don't forget to click on the Designer's name to travel to their blog for more details on their fantastic projects and to leave an encouraging word or two.  We hope you'll join us Friday for our weekly Digi Desserts Fridaze! 

~ Jen and the CWC Designers

Cartridge Showcase: Lyrical Letters

We are excited that Janet from My Cards For You is showcasing a cartridge for you.  Janet is so talented as you are about to see.


Hi everyone. This week's Monday Cartridge Showcase at My Paper Crafting.com features the Lyrical Letters Cartridge. I have bought the cartridge as a digital one through the Cricut Craft Room, which makes it very easy to cut from as you don't need to insert the cartridge in the machine! It is also available right after purchase in the CCR, so you don't need to wait for it to be posted!

 What I really like about this cartirdge is the fact that there are seven different fonts to choose from, each of which has a capital option as well as lower case. 

There is a variety of shapes and words available on the cartridge, which again, makes it a very versatile one to have.

I have made 5 different projects to showcase the versatility of the cartridge, and those of you who follow my blog, know that I am not really into scrapbooking much, but I have even done a layout for you to see as well!

 This is a simple Valentine Card that is cut right from the cartridge. I used the Connected font selection and cut the frame at 4". The flowers are part of the frame so it cuts as one piece. I added some clear beads to the centres of the flowers using Glossy Accents.

The stamp is from a Hero Arts words set that I use quite a lot! 
 For this card, I used the Connected font again and cut the sentiment at about 5" wide. 

The heart and layers were cut from the Craft Room Basic font selection. I embossed the top heart layer then stitched around it with the sewing machine. I did the same with the layer on the card before adding it to a black card, then onto a white base card cut to fit. 
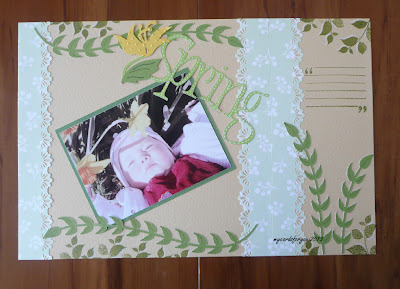
 For my scrapbook layout, I used the Spring word from the Baisc font on the Lyrical Letters cartridge and cut the leaf and flower in different colours. The leaf borders were cut from the Jack Sprat shift/lock font. I added some stamped leaves and a journalling block with peeled paint distress ink and added a little picket fence distress marker to the stamped images to highlight them a little. I also added faux stitching to the lettering with a white ink pen.

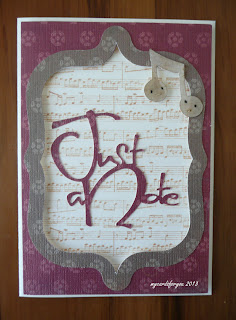
For the Just a Note card, I cut the frames from the Italic Monoline font, the notes and sentiment from Capital font. 

I stamped a music background using a Gina K music stamp in Tea Dye distress ink then layered it underneath the frame. The frame is raised from the card using foam dots to give a little depth. 

The music notes were coloured a little with Walnut Stain distress ink then coated with Glossy accents and attached to the frame. 


The final card was made using the LoopDeeLoo font. I added the letters separately then welded them together before cutting them out. 

The layers on the card were cut using  CCR Basic. I stitched around the top layers with the sewing machine and added some flowers, a diecut leaf and some pearl bling to finish it off. 


Hope you have enjoyed looking at this showcase using the Lyrical Letters cartridge and that it inspires you to get it or to use it if you already have it!

Was that not just a fabulous showcase!!  Thank you Janet for the wonderful projects and great inspiration.  If you have not already visited Janet's blog, you can do so HERE.  Have a great week and come back to visit us here daily.  There is always something new and exciting.
Charlotte

CTMH Almost Gone!

Good afternoon friends,
I wanted to share a couple of layouts that I created. These layouts are what I call….UNPLUGGED. In other words no electricity required. They were made using some great CTMH products that are set to retire at the end of this month. So now is your chance to get them before they are gone.
I have to say that living in such a technology oriented day with electronic die cutters and computers and everything else, it was really nice to purpose to create something with my “hands only”

I wanted to create projects using these two particular stamp sets. I wanted to show that you can “think outside the intended box. The harvest time leaves look as if they are for fall projects only. So here are just two layouts I created to show how actually very diverse this stamp set can be.


So here is my first layout. A "wintery" looking layout.
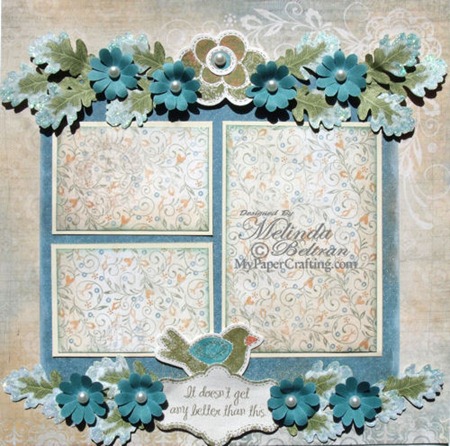
Winter Frost Layout
wintery unplugged lo-500
Here is a view of the entire layout.

GEDC1517
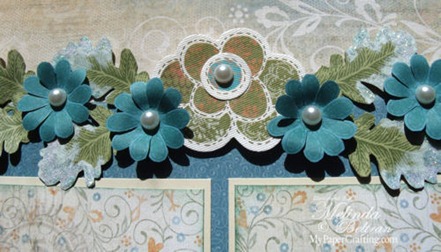
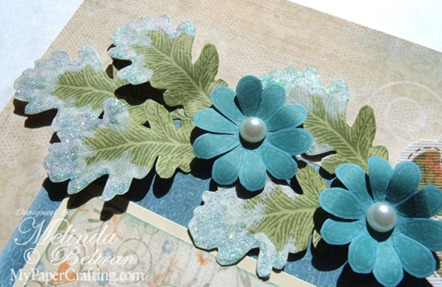
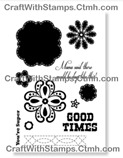
Here is a close up of the top. The center flower was from the Stella Canvas Shape. The blue flowers were from the Clementine Workshop on the go stamp set.
GEDC1520
Here is a close up of the “snow tipped” leaves. I used the White Daisy Ink and some Stardust Glitter.

GEDC1518
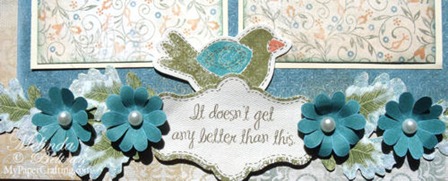
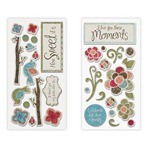
Here is a close up of the bottom embellishments. The bird and embellishments are from the Stella Canvas Shapes sticker set.


I used the following products to create this layout

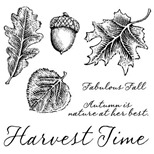
C1504_fall harvest stampsFall Harvest Stamp Set X7147CStella Canvas Shapes
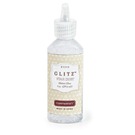
Z1313-stardust glitz
Stardust Glitz Glitter Gel


The next layout, a summery layout.
Love Layout

Complete view of layout.

Close up of the flowers. I created the “hydrangea flower” by using the stamps again from the Clementine Workshop on the go stamp set. The leaves are from the fall harvest stamp set.

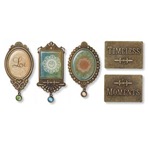
Here is a close up of the Timeless and Love metal embellishments. I love how they add such a nice, vintage touch.

C1504_fall harvest stampsFall Harvest Stamp Set X7158B-labelle-paper pkt
La Belle Vie Paper Pack
Z1689
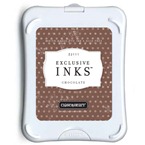
z2111-chocolate
Chocolate Stamp Pad
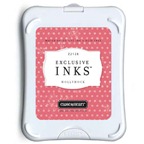
z2128-hollyhock
Hollyhock Stamp Pad
z2106-blush
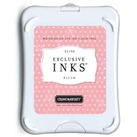
Blush Stamp Pad
Z2167-cremebulee
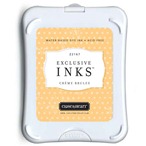
Crème Brulee Stamp Pad

The stamp sets, the canvas sticker shapes, the love embellishments and the La Belle Vie Paper are all set to go away at the end of the month. So you want to consider getting them before then.


Lastly, I wanted to share some details on the card I created for yesterday’s Digi Desserts Fridaze Post as I used some CTMH product to complete it.

Taylor’s Birthday Card

Products Used To Create This Card:
Funky Cake digi stamp from PCW:
Copic Markers: R20, RV06, R32, B02, B00, E39, YG01, V25
EK Success Photo Corner Punch
Misc. White Yarn (Balloon Strings)
White Signo Pen
MS Border Punch
KI Enchanting Paper Pad Patterned Paper
White and Green Cardstock

I then used the following CTMH products to complete
Cricut Artiste Cartridge
Matching Balloon Stamp from the Artiste Coordinating Stamp Set
Birthday Sentiment from the same stamp set
Cotton Candy Stamp Pad
Crystal Blue Stamp Pad
Pear Stamp Pad
Stardust Glitz Glitter Gel


Thank you so much for sharing your crafty time with me! Be sure to visit my CTMH Shopping Link

-Melin