Happy Wednesday and welcome to Cooking With Cricut! Our Design Team challenge this week was to create birthday cards and decorations for children and teens staying in a homeless shelter.
CWC Design Team member Madison Womack is the creator/founder of the "I Feel the Love" Project and is dedicated to bringing a little bit of handcrafted love to people in need. This month's outreach is for Sheffield Place in Kansas City. Sheffield Place opened its doors in February 1991 as a community response to the growing population of homeless mothers and their children in the Kansas City area. Since then, they have assisted more than 560 families in making the difficult journey from homelessness to self-sufficiency. The volunteers throw a birthday party once a month for the children and teens living in the shelter and are in need of decorations that can be reused and birthday cards.
CWC Design Team member Madison Womack is the creator/founder of the "I Feel the Love" Project and is dedicated to bringing a little bit of handcrafted love to people in need. This month's outreach is for Sheffield Place in Kansas City. Sheffield Place opened its doors in February 1991 as a community response to the growing population of homeless mothers and their children in the Kansas City area. Since then, they have assisted more than 560 families in making the difficult journey from homelessness to self-sufficiency. The volunteers throw a birthday party once a month for the children and teens living in the shelter and are in need of decorations that can be reused and birthday cards.
Here is what our Design Team came up with . . .
(Don't forget -- you can click on the Designer's name to travel over to their blog for more details on their project and to leave them a comment and let them know how much you enjoyed their works of heart!)
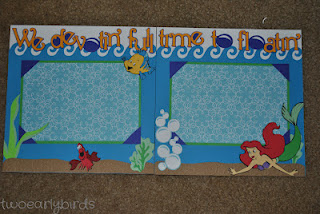
Cricut cartridge used: Create-A-Critter

Cricut cartridge used: Birthday Bash

Cricut cartridge used: Create-A-Critter

Hattie used the Cricut Imagine cartridge More Cards on the next three cards.


Cricut cartridge used: Create-A-Critter

Cricut cartridge used: Paper Lace and Nate's ABCs

Charlotte used the Cricut Paper Pups cartridge for her second card.

Cricut cartridge used: Paper Trimmings

Cricut Image cartridge used: Better Together (both cards)


Cricut cartridges used: Mother's Day 2010, Mickey & Friends,
Mickey Font and Hello Kitty Greetings


Now, it's your turn! Link up your child/teen birthday card or birthday decorations before midnight next Tuesday for your chance to be our next Top Chef! Here are the guidelines:
- Must follow the challenge topic.
- Must be a NEW project for this challenge, please no back dated posts.
- Must have a link back to this post on your blog.
- Must link your project through Inlinkz and not just your blog.
- Must use your Cricut in some capacity.
- Must have fun!
- You may gladly combine challenges . . . we love to pile it on TOO!
And we would LOVE IT if you'd link up at "I Feel the Love" and send your cards to Madison for the Sheffield Place kids. Just imagine the huge smile and warm fuzzy feeling the birthday boy or girl will get when they open their very own handmade birthday card! His or her face will light up knowing that someone out there cares enough to send such a wonderful gift.
Thank you once again for stopping by and making us a part of your crafty time! We appreciate each of you so much! Don't forget to stop by tomorrow and check out what Chef Melin has whipped up for our Thursday Showcase!
Thank you once again for stopping by and making us a part of your crafty time! We appreciate each of you so much! Don't forget to stop by tomorrow and check out what Chef Melin has whipped up for our Thursday Showcase!
~ CWC Design Team


")