12_01

Challenge Reminder * FREE FILES & DISCOUNT *


Good afternoon crafty friends,

Today’s post is to remind you of our new Stamp or Die Cut challenge. The PCW design team is hosting a bi-weekly challenge using either stamps (digital or regular) and or a die cut. The die cut can be from ANY source and does not have to be Cricut. It can be from your Spellbinders, Sizzix, Lifestyle (Quickutz) or from your Pazzles, Gazelle, Cameo or even from your punches! This is about showcasing the wonderful digital stamps and die cuts.


The ONLY requirement is you must use one of the free files in your project. Each challenge we will offer you a FREE Digital Stamp AND a Free Cutting File to use in your Electronic Die Cut Machine. The Die Cut pattern will also have a pdf file that you can print and hand cut if desired :)

So here are a couple of projects using the current FREE files and to go along with our Welcome Baby Theme. Designer Evelyn is hosting this challenge, so be sure to visit her blog and thank her for the wonderful inspiration.

FIRST: HERE is the Challenge Post where you can see what the designers showcased last week AND this is also where you can grab the FREE files AND enter.


evelyn 350
Evelyn created this super adorable card using the FREE heaven sent digi AND the wings from the FREE Butterfly file. She also paired it with the Baby Duckies Cutting File from PCW. Be sure to visit Evelyn’s Direct Post HERE for the details on HOW she put these sweet card together.
evelyn reminder project-rr

melinda 350
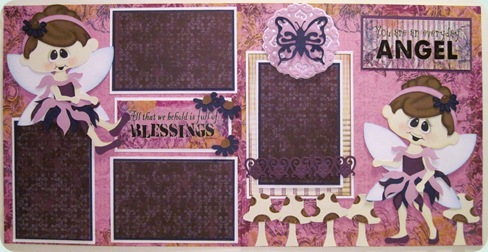
Melinda created this adorable layout using the Baby Set 5 elephant and booties from PCW and the FREE Butterfly n’ Flourish Cutting file (see below).


IMG_2210
Here is the complete layout. I created this layout using the NEW Quick Quotes Paper and embellishment line called: One Fine Day. It is GORGEOUS!!! The double sided cardstock weight paper patterns are DYNAMITE! They are so versatile. I used it for a baby layout, but wait until you see what else it is great for!!!
IMG_2212
Close up of the layered butterfly and the baby booties.
IMG_2206
Close up of the adorable little elephant from Set 5.


Check Out These Super Adorable, New Cutting File Sets From


pcw duckies papered 3502


pcw baby set1 3502


baby set2 papered 3502


baby set 3 papered 350


baby set 4 papered 3502


baby set 5 papered 3502


set 6 350
Now for a little extra incentive to join the fun!
Buy any two of these sets and receive a third set FREE!
Just choose any of these baby sets over at pcw 
Just add all three sets into your cart and when checking out use code:
PCWBaby and your third set will be FREE!
*Must be a minimum $7.00 purchase (two least expensive sets total)


UPDATE: Find these files on PaperCraftingWorld.com
butterfly n flourish-350
heaven sent digi 350
Thanks so much for stopping by! Be sure to come back tomorrow for our new
Wonderful Wednesday Cooking With Cricut Challenge!

Cartridge Showcase: French Manor


Welcome to CookingWithCricut.com and our Monday Cartridge Showcase.  Today Chef Charlotte is taking over and sharing projects that she has created using Cricut's French Manor cartridge.    This cartridge allows you to accent your projects with a touch of old European elegance.  It is filled with exquisitely rendered images such as fleur-de-lis, furniture, and other accents. You’ll also love the coordinating tags, cards, and borders included.

So without further ado, here's Charlotte!


Hi everyone!! How exciting it is to be showcasing one of my very favorite cartridges. This cartridge has some of the most beautiful and versatile cuts of all the Cricut cartridges.  

First I want to share with you a note card I made just for this showcase.


This is an A2 card made with paper from DCWV’s Royal Garden. I just fell in love with these two stacks. The colors are vibrant and the patterned pages are gorgeous!! A couple of the pattern pages have peacock feathers on them. So when I decided to make the card using the peacock cut, I knew I had to use that peacock paper. Doesn’t it make the peacock look beautiful! The ribbon is some I found last year at Michael’s, and I wish I had gotten more rolls of it. It is perfect for this card.

This next card has a totally different look. It is made a border and frame from French Manor. I made this card for a friend I work with who is going through a very difficult time in her life.  


Don’t you just love this border that I cut for the sides of the card. I especially love the way it has a slight curve to it. The pretty frame in the center is stamped with a sentiment stamp from K Andrew Designs. This stamp is from a set called Scripture Sayings. I hope this will be encouraging to my friend.

This next card was made for a challenge who's t
heme was “Time For A Change”.  If you'd like more details about this card here is the link to the post on my blog.


The card is embossed with a pocket watch folder from Tim Holtz. And the clock is cut from the French Manor cartridge. The dress form is cut from Nifty Fifties cartridge. I am sure most people would never think that these two cartridges could be used on the same project. But, surprise, surprise, don’t these look great together! As I said, the French Manor cartridge is so versatile.

Next I have a card I made for a friend who was going to spend this past summer in France. It was to wish her and her family a great trip and to say thank you for the fabulous gift card they gave me at the end of last school year. A beautiful cut of the Eiffel Tower and a pretty sentiment cut.


This next card was done last year for a challenge. I just think it says "COUNTRY FRENCH" in bold letters! Take a look and tell me what you think.

 
How gorgeous is this dress form!! Isn’t this just beautiful done in that pretty French blue. I love it!!!


Doesn’t this just make you want to hop on a plane and head to Paris, the vineyards, or the French Riviera? Thank you for letting me share some of my favorite things with you. 

Have a great day!!

-- Charlotte


Oh my goodness, Charlotte!  One beautiful card after another -- and so many little details that make each one so special!! 

Please make sure to give Charlotte a visit at her blog and let her know how much you enjoyed her showcase!

 
~ CWC Design Team


Quick Quotes Dreamscape Sneak Peek & Spellbinders

Good morning crafty friends,

Today’s project is showcasing the wonderful new line from Quick Quotes.
It’s called Dreamscape and it is very pretty to say the least. It is filled with beautiful double-sided paper as well as coordinating vellum quotes and a great new product called Vellum Silhouettes. Here is my project.
love sweet love layout
Here is a close up shot to show the beautiful butterfly. I purposely didn’t do a thing to it. I wanted it to just be the subtlest of accents. It is layered on top of the pretty hearts that I cut from my Grand Calibur and the Classic Scalloped Hearts Dies from Spellbinders.
butterfly on heart close up

Here is a close up shot of the Ribbon Banners die I used. It is adhered to the ribbon and the ribbon is adhered to the edges of the matte. This way, when I put a photograph in, it will easily slide underneath. Also notice the tiny little hearts. Those are the “negative” pieces from the Contemporary Hearts Pendants spellbinders die set
ribbon banner close up


Here is a shot of the vellum silhouette. I decided I wanted to “color” it with my Copic Markers. It worked like a charm. The copics didn’t bleed through and dried very quickly. Also, there was no feathering or bleeding. So it is wonderful with your copics!
vellum closeup 1

Here is a close up of the vellum.
vellum closeup

flower closeup
Here is the Die cut flower from PaperCraftingWorld.com that I cut on my Pazzles Inspiration. I inked it with the different inks and curled the petals for some dimension.

Here are the products I used to complete my project
Quick Quotes Products:
Dreamscape designer paper
xx75 Vellum Silhouette
Adhesive Backed Die Cuts (Photo Corners)
Frosted Butterflies
Purple Grosgrain Ribbon
Mocha Mama, Amaretto and Very Berry Chalk Inks
Jewels (Past Club Q Kit)

Spellbinders Products
Ribbon Banners
Classic Scalloped Hearts
Contemporary Hearts Pendants

Other Products
French Vanilla Bazzill Cardstock
Copic Markers: RV13, RV17, RV19, Y15, YR23, E23
Prima Flowers
Versamarker and Pen
Cream and Pink Cardstock (For Flower Die Cut & Matte)
Adhesive


I hope this will inspire you to “dreamscape” your next project :)

Thank you for stopping by.
Melin

Celeste’s Birthday Hop

IMG_2251


Good morning crafty friends,

Today we are celebrating the incomparable Celeste's birthday. She is one of the amazing designers here. You may remember her from the several AMAZING projects she showcased during our recent 25 days of Crafting Extravaganza!

I have been personally blessed getting to know this truly generous and kind hearted blogger! If you have come from Amy’s blog then you are in the right place. If you would like to start from the beginning, please head over to Celeste’s blog and enjoy!!!

So here is the project I created. This layout was created with Celeste in mind. She is a “butterfly” person and she loves her pinks and purples. So I created this new cutting file set called QT Patootie Celeste a sweet little “butterfly fairy”. She will be available soon on PCW. I created this layout from a brand new paper and embellishment line called “dreamscape” from Quick Quotes. It will be premiering at CHA.
IMG_2251
IMG_2254
This is a beautiful vellum quote from the Quick Quotes Dreamscape line.
IMG_2256
Here is a close up of the QT Patootie Celeste Sitting Butterfly Fairy
IMG_2257
Here is a close up of the standing QT Patootie Celeste Butterfly Fairy.
closeup of butterfly and medallion
Here is a close up of the pretty spellbinder medallion and a butterfly cut.

IMG_2252
Here is a close up of the mushrooms and the spellbinders border.

Celeste, thank you so much for being such a wonderful friend. I am grateful the Lord allowed our paths to cross. I pray that you have a wonderfully blessed birthday and that your coming year will be filled with health, happiness and hope in the Lord.

So now on to Paula’s blog to see what sweet treasure she has in store for you!

Here is the complete hop line up if you get lost along the way. Be sure to hit them all and leave a little love. Also, Celeste has lined up some great prizes too!

Celeste-- www.touchedbyabutterfly.com
Heather-- http://joemamainks.blogspot.com/
Amy-- http://aimitup.blogspot.com/
Melin-- http://www.cookingwithcricut.com/
Paula-- http://purplecows.net/blog/
Monique-- www.uniquemoniquecreating.com
Kerri-- http://kerripowell.blogspot.com/
Debi-- http://fabric-ecraft.blogspot.com/
Jani - http://papercompulsions.blogspot.com
Yolie--  http://www.justyolie.com/

Thank you so much for sharing your crafting time with us!

Be sure to come back tomorrow as I debut another project from the CHA Quick Quotes Sneak Peek!

Winners Announced:)


Welcome to Cooking with Cricut
Today we would like to announce the winner of Challenges
#65- Holidays Florals and #66- Year in Review!
------------------------------------------------------------------------------------------------------------------------------------------------  
#65- The winner of the Top Chef prize was chosen by 
Random Organizer.

The winner is...Judy- Judy's Handmade Creations
Congratulations Judy:)

Judy designed and created this beautiful Christmas tag using the Flower Shoppe Cricut cartridge.  You can "pick up" your top chef button on the left column and proudly display it on your blog.  As the winner Judy will receive her choice of digi stamp or cutting file from Papercraftingworld.com

Judy, please contact Madison at FunkyCards @Charter .net (no spaces) within two weeks to claim your prize.

The Top Three Chefs were chosen by the Cooking With Cricut Design Team. You can "pick up" your top chef button on the left column and proudly display it on your blog. 


Glenda- Glenda's Cards
---------------------------------------------------------------------------------------------
#66- The winner of the Top Chef prize was chosen by 
Random Organizer.

The winner is...Melissa- Moe Creations
Congratulations Melissa:)

Melissa designed and created this amazing recessed window card using the French Manor Cricut cartridge.  You can "pick up" your top chef button on the left column and proudly display it on your blog.  As the winner Melissa will receive her choice of digi stamp or cutting file from Papercraftingworld.com

Melissa, please contact Madison at FunkyCards @Charter .net (no spaces) within two weeks to claim your prize.

The Top Three Chefs were chosen by the Cooking With Cricut Design Team. You can "pick up" your top chef button on the left column and proudly display it on your blog. 


It's a new year and time to use your new things:)  For this week's challenge, we are asking you to use something new that you haven't used yet on your project, i.e., a new cartridge, new paper, new bling...If you don't have anything new, it can be something you recently received as a gift or may have just purchased:)  Remember to let us know what your new item is and please include one Cricut cut!! Once again you have until next Tuesday at midnight to post your projects.  One winner chosen at random will receive his or her choice of digi stamp or cutting file from Papercraftingworld.com.

Have a wonderful day!


~Madison - Prize Coordinator

Cartridge Showcase: Lyrical Letters


Welcome to Cooking With Cricut's Cartridge Showcase.  Chef Debbie has taken over the blog today is sharing with you some beautiful projects she has made with Cricut's Lyrical Letters cartridge.  

This cartridge has seven distinct fonts you can mix and match to express your personal style, create delightful and thoughtful projects for the holidays, seasons, and so much more.  It includes: Capital, Connected, Loop Dee Loo, Jack Sprat, Jumbo, and Italic Monoline creative features.

So without further ado, here's Debbie . . .


A couple of years ago when I bought my first Cricut (the little bug) one of the first cartridges I purchased was Lyrical Letters. I used it for everything! I still have it as my go to cartridge when I need a font.  

For the cartridge showcase, I am going to share a few projects that I have used Lyrical Letters for. 
I used Lyrical Letters for a baby name for a mini toilet paper roll album I made.  Here is a picture of it and the post can be found here.


Another project where Lyrical Letters was used was making some baby shower items for a young lady at my work.  Before I had a cartridge that had banner cuts on it, I used Lyrical Letters and cut the triangles and just cut the little tag/circle part off the top.  I actually love the way these triangles are cut with a little curve to them.  Here is a picture of that and the full post can be found here.


When I wanted to put some vinyl on my craft room wall I knew immediately I would use Lyrical Letters (I used it and my Imagine to do names for my daughters' rooms, but don’t think I ever posted that for some reason…I need to take a picture of them one day).  Here is a picture of that and the post can be found here.


I needed a sympathy card and knew the sentiment on Lyrical Letters would be perfect.  I made this card using it, here is the post.


I also made this cute thank you card using Lyrical Letters.  The post can be found here.


Great projects, Debbie!  Make sure you head over to her blog and check out all the details on these fantastic projects!

~ CWC Design Team

P.S.  Don't forget to mark your calendars . . . our first Blog Hop of the new year is scheduled for January 14 & 15th!  Two days -- two sets of Designers!