Showing posts with label Mini Monograms. Show all posts

14_02

Love Struck Layout - Cricut

Hello crafty friends,
Today I am sharing another layout I had created with a valentine’s –love theme.

Here is a view of the entire layout. I actually used my cricut for several of the elements. I had made a version of this layout a LLOOOONG time ago for a class I taught and as I was going through my “valentine” stuff, I found my extras bag of goodies and decided to freshen it up. The majority of it was created with cuts from my various cricut cartridges.


The Love Letters were from the Mini Monograms Cartridges.
The Struck Letters were from the Base Camp Cartridge.


The Wings, Hearts arrow and sash from the Paper Doll Dress Up Cartridge
The Scallop Circles were from the Art Philosophy Cartridge.
The bear was from the George and Basic Shapes Cartridge. With the exception of the arms. Those were hand drawn at the time. The background paper was from the Bo Bunny Oh La La Cupid Collection. The Black and White Polka Dot Paper was from Pebbles, Inc. Basics Stack from Hobby Lobby.

I used the following inks:

This bear was made right around the time I created my first Cricut piecing. If you would like to see some of the other ones I have made, you can visit my gallery HERE.  I am working on making recipes for all of these, but it always seems to get pushed back. I am sorry about that, but will work to get it done soon.

Products Used To Complete This Project
clip_image001
Expression
clip_image002
George and Basic Shapes
clip_image003
Mini Monograms
clip_image004
Base Camp
clip_image005
Art Philosophy Cartridge
clip_image006
Pebbles Dry Decorator Chalk
clip_image007
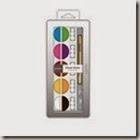
Enchantment Ink Pad Set
clip_image008
Whimsy Ink Pad Set
clip_image009
Adventure Ink Pad Set
clip_image010
Basics Ink Pad Set
clip_image011
Tombow Adhesive
clip_image012
Foam Tape
clip_image013
White Chalk Marker

Additional Products Used
Red, Black, White, Brown, Tan and Pink Bazzill Cardstock
Misc. Black and White Polka Dot Ribbon

Well, I think that about covers it for today. Don’t forget to visit Saturday’s post for the links to the freebies and be sure to come back tomorrow as I share another fun and hopefully inspiring project! Until then,


11_08

CWC#49 Family Fun


Good afternoon cricutlicious and super crafty friends!

Thank you for joining us for another challenge! Let’s get right to it!
Our challenge this week is…..
FAMILY FUN
We would like to see your projects with a theme that you and your family enjoy doing. FUN…FUN…FUN! What do you like to do!!!!
Here is what the super talented Design Team Chefs came up with!

Chef Roberta
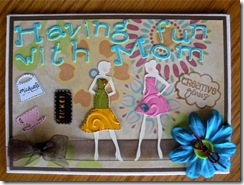
Roberta used her Block Party, Tags, Bags, Boxes and More and Mini Monograms Cartridges.
roberta block party-tbbm-mini monograms
Chef Madison
Madison used her Forever Young and Wall Décor Cartridges.
madison forever young wall decor more-500

Chef Jean
Jean used her 3 Birds on Parade Cartridge.
jean 3 birds

Chef Gaby
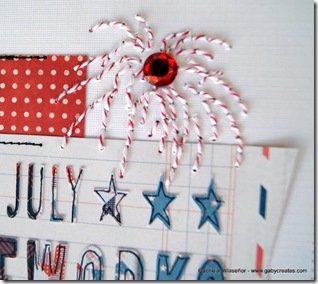
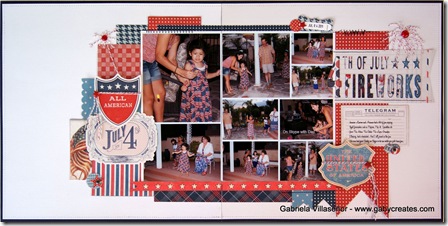
Gaby used her Stand and Salute and Word Collage Cartridges.
gaby stand-salute and word collage
Close up of Gaby’s Firework..Fantastic idea Gaby!
fireworks close up
Chef Melin’s Projects
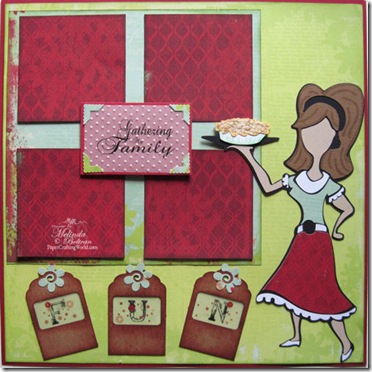
Gathering My Family 4 Fun Layout.
I made this layout because we LOVE to have dessert. Honestly, quite a bit too much but my daughter loves to bake and we love to eat….so you get the picture…lol! I will put a picture of each of my children and hubby on this layout eating something deeeelish!!!
cricut layout idea gathering family-500
cricut idea pie layout-500
Close up of “pie” die cut from Block Party. I used some Distress stickles to give it that texture on the top. I didn’t want glittery but rather “sugary”. The Baker is also from the Block Party Cartridge. I did use my gypsy to “hide” her facial features.
quick quotes club q elements-500
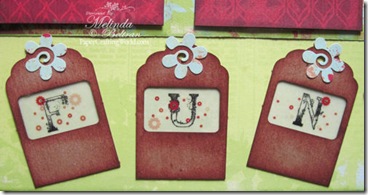
Close up of the tags with Vellum letters.
These were from the Quick Quotes Club Q kit.
quick quotes vellum quote-500
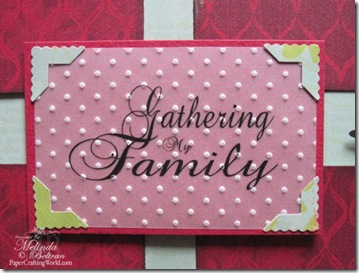
Close up of vellum quote. This is from the Itty Bitty Box Quotes: Babies, Kids & Family.
Design note: I ran this quote through my cuttlebug with the Swiss Dots embossing folder to give it that little extra texture. The dots are raised and turned white!
Melin’s
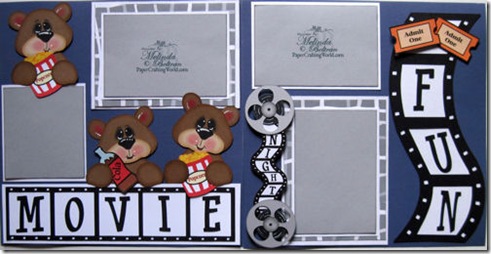
Movie Night Fun Layout
cricut layout idea movie popcorn cutting file-500
I used my Cricut and some software to make this layout. The other thing we LOVE to do is watch movies. So we have “movie nights” pretty often.  This project is available as a kit from PaperCraftingWorld.com. You can go directly HERE to purchase it.
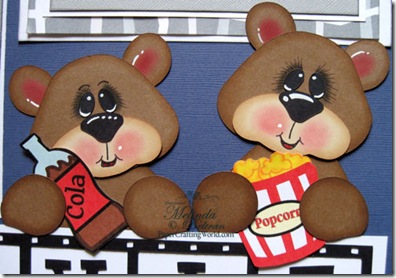
cricut bears paper piecing movie cutting file-500
Here is a close up of two of the little bears enjoying their treats.
cricut movie filmstrip night digital stamp
Here is a close up of the filmstrip die cut.
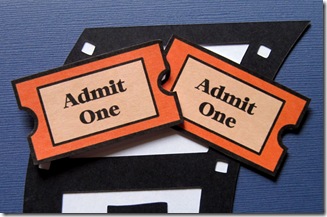
cricut movie ticket digital stamp
Here is a close up of the “Movie Ticket” Digital Stamps.
Now it’s your turn!!!
Let’s see your Fantastic Family Fun!
Here are our few guidelines.
* Must follow the challenge topic.
* Must be a new project for this challenge…please no back dated posts.
* Must have a link back to this post on your blog.
* Must link your project post through Inlinkz and not just your blog.
* Must use your Cricut in some capacity.
* Must HAVE FUN!
Thank you SO MUCH for joining us once again! We appreciate it so much!
Have a wonderfully crafty day.


10_06

Cupcake Box-Cricut and Template

Hello everyone,

Here is a cute Cupcake Box project I made. using the following items:

Cupcake Box: Cutting File (WPC, GSD, SVG)
Cricut Cartridges: Mini Monograms and Celebrations
MS Border Punch: Cupcake Border
EK Success Punch: Daisy Border

View of Top.

Side view 1

Side View 2

I used the Mini Monograms cartridge to cut out the scallop frame. I cut out a piece of transparency and sandwhiched it between the scallop and the top of the box. That way when you open the box, you don't see the mechanics on the inside.

I used the Celebrations Cartridge to cut out the tag, the word Celebrate and the cupcake. I inked the cupcake pieces with Lime Pastel, Orchid Pastel and Amber Clay Chalk Inks.

I used the MS Cupcake border punch and the EK Success Daisy border punch to create the borders around the box.

Finally, I used some Lavendar Liquid Pearls and some StarDust Stickles to create the pearl drops and the glittery effect on the letters of Celebrate and the frosting of the cupcake.

*UPDATE*
Sorry, FREE file no longer available. Please visit PCW for all our very reasonably priced cutting files and digital printable stamps.