Showing posts with label Forever Young. Show all posts

11_08

Guest Designer Tuesday!

 
Welcome to Guest Designer Tuesday
at Cooking With Cricut!

Our special Guest Designer this week is Glenda from Glenda's Cards.  Glenda lives in northeast Louisianna in a small rural area.  She is married with two children and four grandchildren (whom she confesses to spoiling every chance she gets).  Glenda works in healthcare and in her free time enjoys crafting (cross stitch, ribbon embroidery, scrapbooking and cardmaking).  She also loves genealogy, flower gardening, and the Red Hat Society!  Glenda is showcasing the Cricut Forever Young cartridge today. 
 
 
I am very excited to be guest designer for Cooking With Cricut today!  I was very surprised to receive the invitation and of course, loving the challenge blog, I am happy to be here with you!  Cooking With Cricut is one of the first challenge blogs that I began participating in after I started my blog.  I always look forward to the weekly challenge and participate as I can. The Chefs are always cooking up beautiful and inspiring projects!  I want to thank everyone at Cooking With Cricut for the honor of being a guest designer today!
 
My fun with the Cricut began in 2009 when I purchased the Expression.  I am a member of the Red Hat Society and I started scrapbooking our fun meetings and travels.  Which soon led to cards and blogging!!  What fun!  I am always buying red and purple paper.  I enjoy finding cartridges that have great cuts for my Red Hat friends.  I was so happy to find Forever Young - hats, dresses, gloves, shoes, purses --- perfect!  Today, I am sharing a Tri-Shutter Card featuring some of the pretty cuts from Forever Young!

The card starts with a 5 1/2" x 12" piece of red card stock.   This card style is perfect for using your beautiful designer papers.  I am using purple card stock and the designer paper is K&Co. Red Hat Society, which I have been hoarding for some time.  I find it very hard to find reds and purples.  I have used several Cuttlebug embossing folders to add a bit of dimension. Swiss dots is used on the purple background papers.  Do you see the little purple flower on the hat? It is embossed with Bloom Dots and the hat (page 63 cut at 1 1/2") is embossed with Swiss Dots.  The purple gingham mat is embossed with Divine Swirls.  The mat cut is actually flower 3 on page 66, using the shift key and is cut at 4 1/4".  The flowers are on page 69, cut at 1 1/4" and the layers are pop-dotted.

With the card opened, you can see more of my selected cuts.  The Cricut has really been chirping this week!  I used ten different images on this card, plus the layer and shadow features!  The shoes tag is found on page 54 and is cut at 1".  I thought it was so cute and I just had to make room for it.  DMC Memory Thread is used for the hanger and the tag is pop-dotted on the mat.  Ooh la la is cut at 3/4" (page 57) and the glasses are cut at 1/2" (page 47).

 
I used the model14 cut on page 37.  She is cut at 3 1/2", first in ivory and then again in red.  I trimmed the red hat and red shoes off and glued them onto the ivory cut.  The dress is embossed with the Cuttlebug Textile folder.  The shoes are cut at 1 3/4" (page 54), the purse is cut at 1 3/4"(page 56), and the gloves are cut at 1 1/2" (page 45).  Of course, Red Hatters love bling -- must have rhinestones!  Lots of inking, ribbon and rhinestones from my stash!
 
This is an easy card to make, but it does take time cutting out the mats and layers. The photo above is the card laying flat.  Hope you enjoy!  I had so much fun making this!

Again, many thanks to Cooking With Cricut for the great opportunity!


WOW . . . this is an incredible card!  Lots of amazing detail and so many special little touches! Thanks again, Glenda, for your continued support of Cooking With Cricut -- we love seeing what you cook up each week.

Please take the time to go over to Glenda's blog and show her some crafting "love!" She also has a link to a great tutorial for the Tri-Shutter card.  See you back here tomorrow for our weekly challenge. You won't want to miss it!

~ Jen

11_07

Card with Pen Work


Good morning crafty friends,

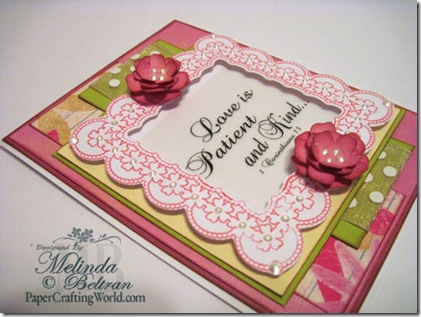
Here is the card I made featuring pen work with the Amy Chomas Glitter Gel Pens, Beautiful Quick Quotes products and my Cricut. This is for our new challenge here at CWC.

love is patient card by melin-500


close up of love card-500
Here is the recipe for the card:

Quick Quotes: Mary’s Garden 200 Designer Paper
MG200

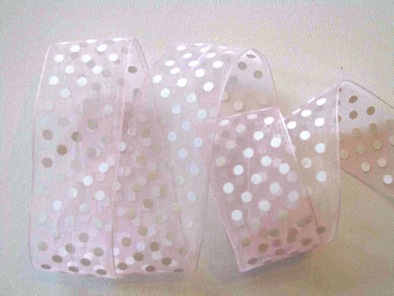
Quick Quotes: 1.5 Pink Polka Dot Organza Sheer Ribbon
1.5 pink dot sheerrr

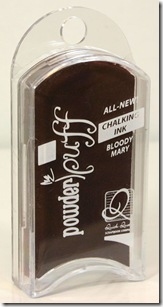
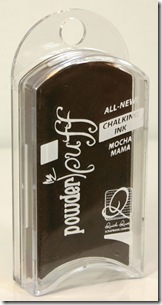
Quick Quotes: Bloody Mary and Mocha Mama Powder Puff Chalk Ink.
BloodyMaryMochaMama

Quick Quotes: Baby, Kids and Family Itty Bitty Quote Box. This is the 1 Corinthians Quote on the card.
bb6babies
Pink, Mauve, Green and Cream Bazzill Cardstock
White Cardstock for Pen work
Amy Chomas Pen holder and Glitter Pen
SVG drawing and cutting file for frame.
Forever Young Cartridge for the little flowers.
Liquid Pearls for the Pearl accents
Cricut Expression and appropriate software.

Be sure to join our challenge HERE!!! You can use your Cricut or other pens for “drawing” OR if you don’t have these available you can use a SUN die cut on your project!


Remember to stop back by tomorrow as we announce our winners from last week’s challenge and feature another great project!


Thank you so much for stopping by!

Have a wonderful day!


QQ 40% Sale & Anything Goes Challenge


Image7
WOW!!! Check this FABULOUS DEAL OUT! 
Quick Quotes Is Having a 40% off sale!
That means you can get all the great powder puff chalk inks I have been using on my projects for a STEAL!!!!  Be sure to use the supersale11 code when checking out!

I used it and got some paper that was already on sale for a bargain basement price! PLUS ALL THAT YUMMY RIBBON and their famous QUOTES!

Be sure to let them know I sent you :-)


Now on to a project that fits our ANYTHING GOES Challenge this week!

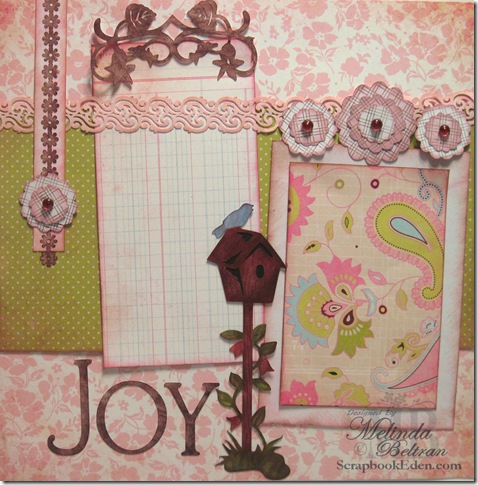
Joy Layout
joy logo
flower closeup
IMG_2694
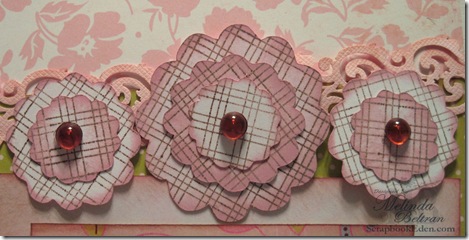
To create this layout I used the Botanicals Cartridge for the flourish above and the birdhouse. Forever Young for the scalloped “flowers” and I can’t remember which cartridge the Font came from. The daisy border as well as the “lacey” border came from a couple of punches.


As always, thank you for stopping by! Have a wonderfully crafty day!


11_04

Cutie Pie Layout: Rudi Digi


Hello crafting friends,

Here is my project. I created it with a few challenges in mind. Our challenge: HERE
The following challenges at Simply Scrapping Crafts: Cricut , Copic Coloring and Sketch Challenges.
cutie pie-500wjl
Here is a view of the entire layout.
http://www.mypapercrafting.com/2011/04/simply-scrapping-challenges.html


cutie pie close up-500wjl
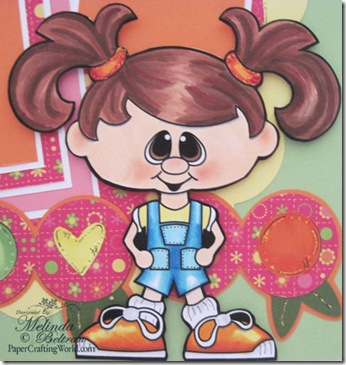
Here is a close up of the Rudie Cutie Patootie Digital Stamp.


cutie pie another side closeup-500wjl
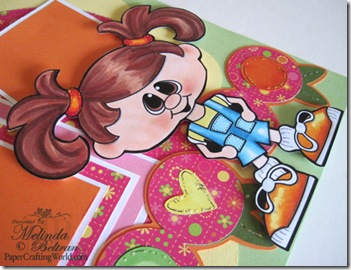
Here is an angled view of the Rudie Cutie Patootie Digital Stamp.


cricut cupcake title-500wjl

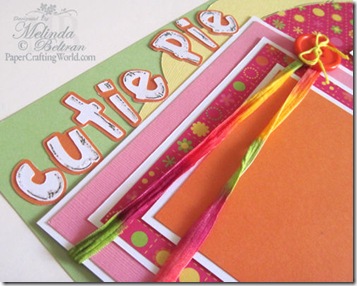
Here is  a close up of the title.
Here is my recipe:
For the Copic challenge I used the following Copic colors: 
B00, B02, B12, B14, BG02, E00, E13, E15, E19, E25, E29, Y13, RV13, YG13, YR16

For the Cricut Challenge:
Cartridges Used
Forever Young
Holiday Cakes
George & Basic Shapes
Cupcakes Lite

I used the Forever Young Cartridge and used my Fit To Page 
function to create the scalloped yellow background piece.
I used the Holiday Cakes cartridge for the floral border 
George and Basic Shapes for the Patterned Paper Circle. 
Cupcakes Lite Cartridge for the “Cutie Pie” title.


For the Sketch Challenge: 
We had to follow this sketch.


And of course for our challenge here this week at CWC: We had to use stuff in our stash that we’ve had for at least a year. The patterned paper from Kaiser is almost two years old.

Each day of the week they have a new challenge at Simply Scrapping:
Again here are the links to the challenges: 
Simply Scrapping Cricut Challenge
Simply Scrapping Copic Coloring Challenge
Simply Scrapping Sketch Challenge


If you’re interested in the Rudie Cutie Patootie 
Digital Stamp you can purchase it: HERE
colored papered png-200wjl

Be sure to come back tomorrow for our new Cricutlicious challenge!
Have a wonderful day!
Melin

10_09

Freshmen Layout

Good morning Everyone!
Today is Day 2 of the Fantabulous Cricut Crawl! I am so super excited to be a part of this hop. It is my first ever :-) So to continue with the theme, I made this project. It is a layout of my DD on her first day of High School! She was so excited!

To create today's project, I used the following cartridges: Lacey Labels, Forever Young, Cursive 101, Cake Basics and my Gypsy.

Here is a view of the entire layout. I used the Lacy Labels cartridge to cut out the frame. The frame-label was cut at 8.5". I spritzed the frame with some crushed shells glimmer mist and inked the edges lightly with my Chestnut Roan chalk ink.
Here is a closeup of the title I made. I used the Cursive 101, Cake Basics and the Gypsy to weld.
Here is a closeup shot of the small flowers. You can kind of see the shimmer and depth in this shot. They are really pretty in person.
Here is a closeup shot of the large flowers.
To make the flowers: I started with flowers from the Forever Young Cartridge. I cut them in sizes starting at 1.75" and worked my way down to .75". I did them in layers of three. These were cut with plain white cardstock.
  1. I ran the flowers through my cuttlebug using the Victorian embossing folder.
  2. I spritzed them with some Fall Breeze Glimmer mist and then
  3. Inked the edges with my Chestnut Roan chalk ink.
  4. I layered and staggered them. Curled the edges and then dotted the centers with some Perfect Pearls.
Well, I think that covers it: Be sure to leave a comment on this post and yesterday's post for a chance to win a $20 Gift Certificate from Page-Kits.com. Also be sure to see yesterday's post so you can "Hop" your way through the Fantabulous Cricut "Crawl-Hop"!

If you would like the FREE Gypsy Freshman title I created: Click HERE.
Reminder: You will need the Gypsy, Cake Basics and Cursive101 to cut this file.

10_06

Father's Day Layout and Card Set

Good day crafters,
Here is a layout I did for the Pink Elephant challenge. I also completed a coordinating card. 

View of both projects
I used Fall Breeze Glimmer Mist to shimmer up the frame, Flowers and the flourishes. Please see bottom of post for Flower Tutorial link. I created the frame and the flourish for my digital cutter. I want to start sharing some of these files with everyone, but I am still really green in this area. I will update this post with a link to the free flourish file this afternoon hopefully!

View of the layout.
The flourishes on the border is the free cut file at the bottom of this post.
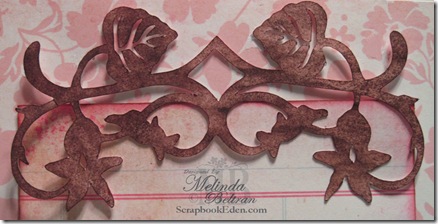
Closeup shot of the flourishes and flowers. FREE flourish file at bottom of post.
Here is a closeup of the card. This is the FREE frame cut file I will be giving to my newsletter subscribers. So be sure to sign up :-)
Different angle to show the raised frame. I will be giving this Digi Stamp Sentiment and the one on the layout to my newsletter subscribers as well.
The frame on the right is the one misted. The other is just the plain cardstock. I am trying to show how very pretty the glimmer mist makes it. It is just hard to photograph.
Here is a close up of the flowers I made. You can make these using a flower on the Forever Young Cartridge. Or you can use punches or a cut file. Whichever you have. I did color the brad with my Copic marker. It was originally a gold brad. Yeah Copics!
I have a quick tutorial on making these flowers on my website.


* UPDATE*
Free file no longer available. Please visit PCW for all our reasonably priced cutting files and digital printable stamps.


Thank you so much for following! Please let all your Cricut, Crafting and Cutting buddies know about my blog. I want to share this with as many people as possible. Thank you for spreading the word!

My Heart BEE longs To You Layout

Good morning all!
Here is a layout I have been working on. I used the following cartridges to complete it:
Create A Critter
Robotz
Forever Young
All the little bumble bees and the nest were cut from the Create a Critter cartridge. The "BEE" letters in the title were cut from the Robotz cartridge. The larger bumble bee is my own creation. Thanks so much for stopping by! Hope you have a "Honey" of a day!
Here is a view of the entire layout.
Here is a close up view of the larger bumble bee paper piecing.
The larger bumble bee and heart are my own original designs.

The little bumble bees and nest came from Create A Critter.
I changed the facial features a bit.

Closeup of "BEE" title. Letters cut from Robotz Cartridge.
Flowers are from the Forever Young Cartridge.
The white borders are from a MS border punch. I used the negatives from the punch for the little white flowers around the little bees.

For those that are interested, this is going to be a kit. You can visit HERE to purchase. Thanks again and have a wonderful day!

Baby Shower Giraffe Layout


Here is the project I did for a couple challenges.
Here is a closeup of the Umbrella Title.
The Umbrellas are from Pooh and Friends
The Lettering is from Songbird
The Flowers are from Forever Young
Here is a close up shot of the Shower title.
The Frames are from Doodletype.
The Lettering is from Simply Sweet
The Flowers are from Forever Young
Okay now for the Giraffe.
I am SO STINKIN' Happy with how he turned out :-)

He was NOT made with Design Studio
He was NOT made with an SVG file or anything like that.
He is STRAIGHT CRICUT ONLY!
YEP, That's right he is all from Cricut. Better yet...
HE is from ONE Cartridge. Oh and
HE IS NOT FROM GEORGE EITHER!

10_04

Heritage Pink and Black

Good morning all,
Here is a layout I made using the following cartridges:

Heritage
Mother's Day
Forever Young.
I also used an EK corner punch, EK Daisy punch and a Martha Stewart border punch.

View of the Entire Layout

Closeup of the Flourish and Cameo.

Closeup of one of the Scalloped flowers.