Showing posts with label Doodlecharms. Show all posts

13_11

DCWV Citrus Stack-Doodlecharms Cricut Crow Piecings Layout

Hello Crafty Friends,
Today I am sharing a layout I created with the Doodlecharms cartridge and some great DCWV Citrus Stack Paper.
cream of the crop cricut lo-450_thumb[1]
Here is a look at my entire two page layout. All the cuts were from the Doodlecharms Cartridge. This includes the super cute little crow paper piecings I created. The letters are from the Art Philosophy cartridge. All of the pretty, patterned paper is from the DCWV Citrus Stack. I love that these paper would work for many different types of layouts and projects.


crow holding cornstalk-450_thumb[1]
Here is a closer look at the cute little crow sitting on top of a photo mat holding his cornstalk. Next to him is a basket full of harvest goodies. All of these were cut with the Doodlecharms Cartridge and my Expression. No Gypsy, Design Studio or Craft Room. I used some Pebbles Basic Chalks for the white around the crow’s pieces as well as some Frost White Pigment Ink. I used Maroon Chalk Ink for the apples, Cocoa for the basket, Orange for the Pumpkins. Warm Green for the leaves and stalks. Butterscotch for the corn, beaks, feet and hay bale. I also used my Copic E59 marker to color the apple and pumpkin stems. I decided to do that as opposed to cutting out all of the stems separately in brown paper…Waste not, want not Smile


crow topper-450_thumb[2]
Here is a closer look at the cute little crow topper.


crow on hay-480h_thumb[1]
Here’s a closer look at the cute little crow sitting on a bale of hay. He is holding a stalk of corn and surrounded by pumpkins, apples and more cornstalks.
Products Used To Create This Project (all can be found at Scrapyland.com ).
doodlecharms[3]
Doodlecharms Cartridge
dcwv citrus stack[5]
DCWV Citrus Stack
basic 10[4]
Pebbles Basic Chalks
cocoa[4] frost white[8] orange pigment ink[8]
Cocoa Pigment Ink Frost White Pigment Ink Orange Pigment Ink
butterscotch
Butterscotch Chalk Ink
maroon[8]
Maroon Chalk Ink
warm green[8]
Warm Green Chalk Ink
Additional Supplies

Orange, Yellow, Cream, Red, Green, Black, Kraft and White Cardstock
American Crafts Ribbon and Mini Brads

Be sure to head over to Scrapyland.com and check out all the many wonderful products they have at great prices.
Thank you for sharing your crafty time with me!

13_10

Cricut Doodlecharms Treat Sign Paper Piecings

Hello Crafty Friends,
Today I am sharing a cute sign I created for my Scrapyland.com DT assignment. It is for the little Trick or Treaters I am expecting this Thursday.
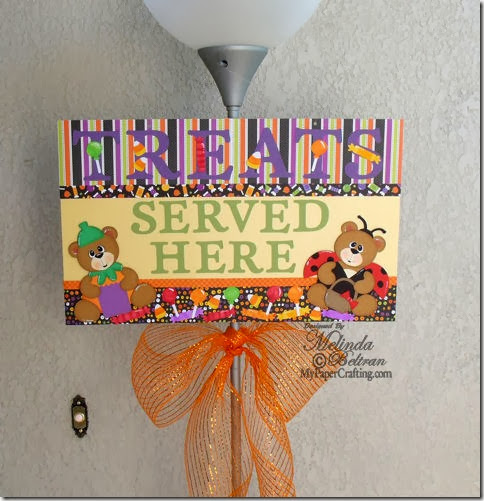
For the last several years, I sit out at the end of my driveway along side my neighbors and we pass out candy to all the little trick or treaters. Because I live in a cul-de-sac, it makes it much easier for the little visitors. Unfortunately, it is a bit “dark” by our end of the neighborhood and with landscaping, it makes it hard for them to see us there. So I have brought out a lamp each year. This year I decided to whip up this cute little sign to help decorate the lamp.

treats-served-here-sign-450
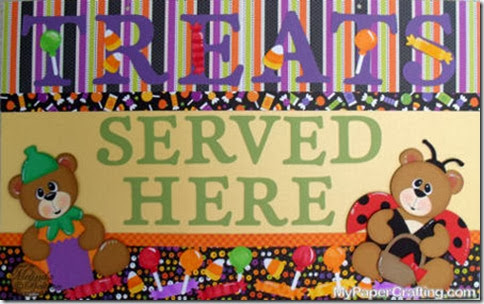
Here is a view of my completed sign. It measures approximately 20” wide by 12” high
The background paper is from the adorable Doodlebug Halloween Parade collection. The letters are from my Art Philosophy Cartridge and the bears and candy are all from the DoodleCharms Cartridge. I created the cute little bears by “paper piecing” several cuts found on the cartridge. These are my own original creations Smile The candy die cuts were all cut in white cardstock. I simply colored them in with my various copic markers to make it quick and easy to add color to each piece.


bear as ladybug-450
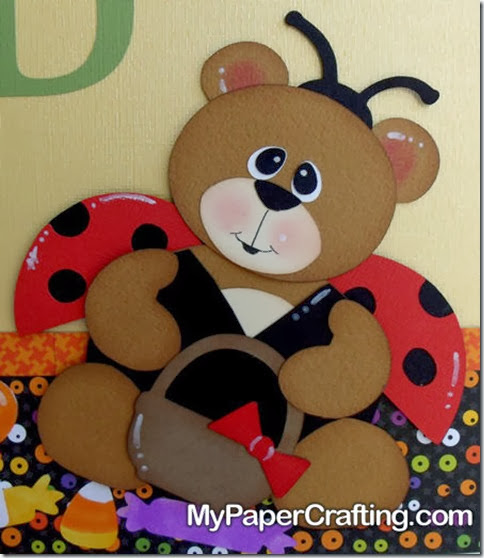
Here is a closer look at the adorable little bear in a ladybug costume paper piecing I created. I inked the edges of her body pieces with some Cat’s Eye ink as well as the basket, bow and wings. I used some Pebbles, Inc chalk for her cheeks and ears.

bear in pumpkin suit doodlecharms-450
Here is a closer look at the sweet little bear in pumpkin suit paper piecing. I also inked the edges of the bears pieces as well as his little leafy collar and hat. I again used some Pebbles Chalk for his cheeks and ears.

If you would like to see more of my Cricut Paper Piecing Creations, 
You can visit my blog page HERE

treats sign-480-doodlecharms
Here is the finished sign, hanging on the light, waiting for Thursday to roll around.

I used the following supplies from Scrapyland.com to complete my sign
Yellow, Orange, Brown, Kraft, Red, Black, Purple, Cream and Green Cardstock
Copic Markers: YG05, Y18, R27, YR16
Cat’s Eye: Dune, Cocoa

Be sure to head over to Scrapyland and check out all the new releases as well as some great prices on many items!
Thank you for sharing your crafty time with me!
2013 fall winter melsig-450

12_02

Cartridge Showcase: Doodlecharms


Welcome to Cooking With Cricut's Cartridge Showcase. Chef Debbie has taken over the blog today is sharing with you some great projects she has made with Cricut's Doodlecharms cartridge.  Accessorize all of your paper-crafting projects with this all-purpose cartridge. You can choose from a variety of cute icons, including rubber ducks, snowmen, sand castles, spiders, and so much more.   This cartridge includes: Tag, Card, Charm, Border, Shadow, and Shadow/Blackout creative features.

So without further ado, here's Debbie . . .


I am not sure how exactly long I have had this cartridge but just recently began using it and cannot believe I had waited so long.  

My most recent project is using it for some Valentine treats. I cut the cute lady bug and dragonfly from this cartridge and their layers. I turned the bug into a “love bug” for my girls and added some Hershey kisses to its spots and I made my dragonfly a “fly guy” for my boys, I added some kisses to theirs as well.


I cut both at 4 inches. I gave them cute Peachy Keen face (different sizes but the same face) and I gave the dragonfly some stickles on the antennae. I wrote a little note on the back for the kids.

Another project I used Doodlecharms for is to cut out the heart shape  to use as a stencil for my daughter's Valentine’s shirt. Here is a picture of that and
here is where you can find the original post if you'd like more information.


I was actually able to then use the hearts (from the stencils) on a card I made recently. Here is a look at it and here is the post about it.


My last project is some teacher appreciation treats I made. I used Cricut CraftRoom and the Doodlecharms cartridge to weld two apples together to make a bag topper. I also cut the leaves from Doodlecharms. Here is a picture and here is the original post.


Super cute projects, Debbie!  Thanks so much for sharing them with us today.  Make sure you head over to Debbie's blog and let her know how much you enjoyed her showcase.  Wishing you all a crafty weekend!

~ CWC Design Team

11_09

Challenge #53: Apples & Honey


Today is the beginning of Rosh Hashanah. While maintained to be a Jewish holiday, it is part of the "missed or lost understanding" of our Christian (Hebraic) roots. Among some of the items eaten during this festival, apples and honey are consumed to symbolize a sweet new year.  So happy new year or  L'shanah tovah!

Here are the sweet apple and honey projects our Design Team came up with!


Dalis used Doodlecharms and George & Basic Shapes cartridges to
create this super cute card.  Make sure you check her blog for the details!


Jen created two 12x12 scrapbook layouts for today's challenge.
 The first uses the "Just Because" Cards and Walk in My Garden cartridges.


The second uses the "Just Because" Cards and Doodlecharms cartridges.
Make sure you check out her blog for the "sweet" details!


Melin created this layout using the Heritage, Give a Hoot and Plantin School Book Cartridges.


Melin created this layout using the Plantin School Book Cartridge, a PIE SVG file from PaperCraftingWorld and a Lifestyle Crafts (formerly Quickutz) decorative border die.


Melin created this layout using the  Just Because, Forever Young and Lyrical Letters Cartridges.

Here is a close up of the little honey bee holding his honey pot. The honey pot is from the Just Because cartridge and the Honey Bee is from Lyrical Letters and George and Basic Shapes. I did use the Gypsy to do some welding but he could be reproduced without the Gypsy as well.


Now it's your turn! Link up your apple and/or honey of a project . . . Here are a few guidelines:
* Must follow the challenge topic.
* Must be a new project for this challenge…please no back dated posts.
* Must have a link back to this post on your blog.
* Must link your project post through Inlinkz and not just your blog.
* Must use your Cricut in some capacity.
* Must HAVE FUN!

Be sure to come back by tomorrow for another cute project!

Don't forget . . . we have a Design Team Call going on and would love to have you join our fun!  The deadline is Wednesday, October 5th -- here is the link with all the specifics.

 
Thank you SO MUCH for joining us once again! We appreciate it so much! Have a wonderfully crafty day.


~ CWC Design Team


11_08

Challenge #47: Picnic!


Good morning, crafty friends and welcome to Cooking With Cricut!  We hope you'll pack a picnic lunch and join us in our salute to National Picnic Month!  The Design Team has whipped up some yummy treats for your viewing pleasure . . .


Madison created this cute little picnic favor box using the Stand & Salute,
Pooh Font, From My Kitchen and Sports Mania cartridges.
Check out her blog for all the details.


Jean used Simply Charmed, Doodlecharms, Paper Doll Dress Up, Paper Pups
and George & Basic Shapes cartridges for this cute layout.  (Her husband drew
and painted the ant!)  Make sure you check out the details at her blog.


Maria Elena used the Mickey Font cartridge for her picnic layout.
Make sure you visit her blog and check out the details.


Jen used the Pooh & Friends, Pooh Font and Everyday Paper Dolls cartridges for her
two page Family Reunion layout.  Check out her blog for details and more photos.


Check out this super cute picnic basket Roberta made using her Imagine and
the Best Friends cartridge.  Make sure you head over to her blog to see how she did it!


Now it’s your turn! Let’s see your picnic projects!

Here are our few simple guidelines:
1. Must be a new project for this challenge. Please no back dated posts/projects.
2. Must include a “Cricut” cut somewhere – somehow.
3. Must post a link to your post and not just the blog.
4. Must HAVE FUN!!!

Thank you so much for participating with us! We are looking forward to seeing your wonderful creations! 

~ The CWC Design Team