Hello crafty friends,
Hope you’re having a Wonderful Wednesday! For those that are following along with me, reading through Psalms 119 and counting the Omer, here is today’s reading portion.
Daleth
25 My soul clings to the dust;
Revive me according to Your word.
26 I have declared my ways, and You answered me;
Teach me Your statutes.
27 Make me understand the way of Your precepts;
So shall I meditate on Your wonderful works.
28 My soul melts from heaviness;
Strengthen me according to Your word.
29 Remove from me the way of lying,
And grant me Your law graciously.
30 I have chosen the way of truth;
Your judgments I have laid before me.
31 I cling to Your testimonies;
O Lord, do not put me to shame!
32 I will run the course of Your commandments,
For You shall enlarge my heart.
Psalm 119: 25-32
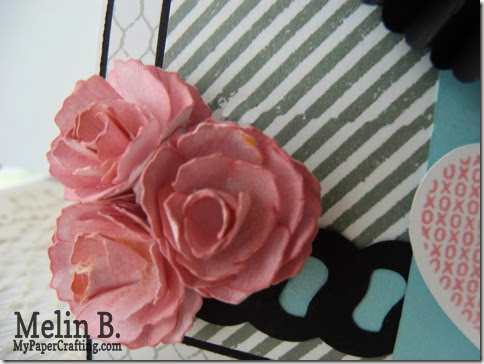
Here is a look at my completed card. It is an A2 (4.25 x 5.5) size. The base is white cardstock. All the cuts are from the Cricut Artriste Cartridge.
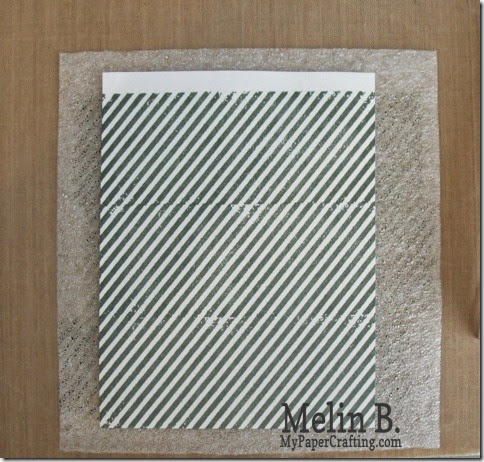
I stamped both backgrounds. The striped background as well as the “chicken wire” background. For the Chicken wire I used some Whisper Ink along with the background stamp. For the Striped background I used some Slate Ink Pad along with the corresponding stamp. I then turned to my Cricut Artiste Cartridge and cut the elements for the rosette, the pennant, flowers and border. I also cut the heart and circle from the Artiste cartridge as well.
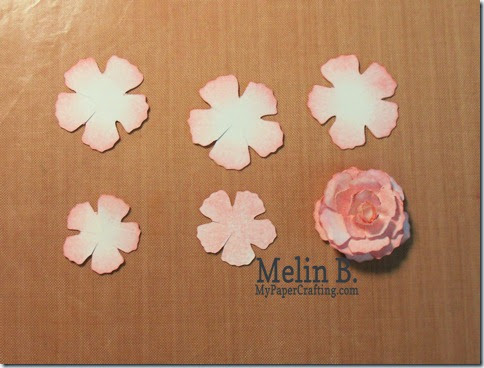
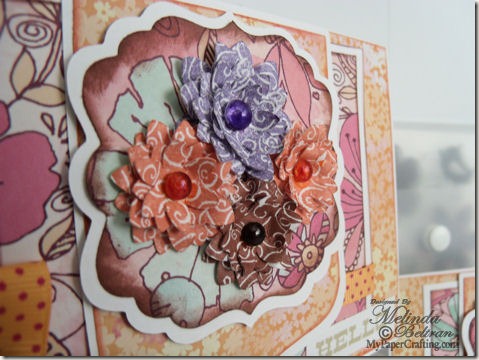
Here are the pieces to create the flower. They are cut from the Artiste cartridge and they can be found on page 54 of the handbook. I cut two at 1” and three at 1.25”. I cut them in plain white cardstock and then inked them with my Blush Ink pad. I cut slits into the small cuts and two of the larger ones. I did this so the petal would be slightly more flexible. Just be careful not to cut them all the way to the center. Once I did that, I pulled the petals up and pinched them using a dowel rod or other round object to help the petals take shape. I applied a small amount of glue to keep the petals closed together.
Here’s what the flowers look like when completed.
For detailed instructions on creating the flower, you can check out this video I created.
Products Used To Create This Project
 Cricut Expression |  Artiste Cartridge Set |  Blush Ink |
 Slate Ink |  Whisper Ink |  Crystal Blue Ink |
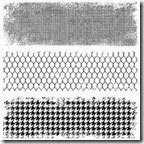 Distressed Backgrounds Stamp Set |  Who Love’s U Set(Retired) | 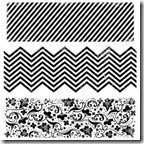 In The Background Stamp Set |
 Black Cardstock |  White Cardstock |  Whimsy Cardstock Pack |
(used Crystal Blue Cardstock)
Want to know how to get the Artiste Cartridge Free? Just sign up to be a Close To My Heart Consultant this month and receive a Cricut cartridge bundle of your choice FREE!
This is a wonderful promotion! It will however be ending soon (only one week left)!
Even if you are not sure about being a consultant, you can still get a ton of great supplies and the cartridge bundle for a fantastic value! If you have any questions, please don’t hesitate to contact me. My email is: melinda {@} scrapbookeden {dot} com. I will be happy to answer any questions you may have.
As always, thank you so much for sharing your crafty time with me. Be sure to stop back by tomorrow for some more crafty inspiration. Until then,


![april-2014-campaign-480_thumb[1] april-2014-campaign-480_thumb[1]](http://lh6.ggpht.com/-r5fq1jNldWo/U1fT6-GLILI/AAAAAAAAt3s/LAAky4q7p84/april-2014-campaign-480_thumb1_thumb.jpg?imgmax=800)
![2013 fall winter melsig-450_thumb[1] 2013 fall winter melsig-450_thumb[1]](http://lh5.ggpht.com/-UxqYaCz9iiU/U1fT9KUpH1I/AAAAAAAAt38/JgYLuRBYtlM/2013-fall-winter-melsig-450_thumb1_t.jpg?imgmax=800)







![CRICUT_ARTISTE_LARGE[6] CRICUT_ARTISTE_LARGE[6]](http://lh5.ggpht.com/-AMjV08yzJmE/Uickxd_sQSI/AAAAAAAAjDU/m1xJZB9AH9o/CRICUT_ARTISTE_LARGE%25255B6%25255D%25255B5%25255D.jpg?imgmax=800)
![C1540 CTMH Hello Blooms Flair Stamp Set[5] C1540 CTMH Hello Blooms Flair Stamp Set[5]](http://lh3.ggpht.com/-G4DiwTNzX6o/UickzaTabvI/AAAAAAAAjDs/hpSL09N6CCM/C1540%252520CTMH%252520Hello%252520Blooms%252520Flair%252520Stamp%252520Set%25255B5%25255D%25255B5%25255D.jpg?imgmax=800)
![z2191-sunset[5] z2191-sunset[5]](http://lh5.ggpht.com/-GXt8f6HFYOs/Uickz80m7gI/AAAAAAAAjAM/i9zony_XSbE/z2191-sunset%25255B5%25255D%25255B2%25255D.jpg?imgmax=800)
![z2190-gypsy[5] z2190-gypsy[5]](http://lh3.ggpht.com/-DsYcpFO7wik/Uick0ZIO2uI/AAAAAAAAjAU/no3cbUYgmmo/z2190-gypsy%25255B5%25255D%25255B2%25255D.jpg?imgmax=800)
![Z2174-champagne[5] Z2174-champagne[5]](http://lh4.ggpht.com/-RVOw_RFdCg4/Uick07wZQxI/AAAAAAAAjC8/eASPo2A_VBQ/Z2174-champagne%25255B5%25255D%25255B4%25255D.jpg?imgmax=800)
![z2104-barn red[5] z2104-barn red[5]](http://lh5.ggpht.com/-KJitN6MkEDY/Uick1SQ8WvI/AAAAAAAAjAo/1MOrhW08zOQ/z2104-barn%252520red%25255B5%25255D%25255B4%25255D.jpg?imgmax=800)
![sugarberry smooch ink[5] sugarberry smooch ink[5]](http://lh3.ggpht.com/-7Z8rh4jP8kc/Uick13uo13I/AAAAAAAAjDw/M4PXpaC976I/sugarberry%252520smooch%252520ink%25255B5%25255D%25255B5%25255D.jpg?imgmax=800)
![smooch siren ink[5] smooch siren ink[5]](http://lh4.ggpht.com/-UJQMh96vc8g/Uick2trmYNI/AAAAAAAAjDM/dsgUqutdBYk/smooch%252520siren%252520ink%25255B5%25255D%25255B3%25255D.jpg?imgmax=800)
![early dawn[5] early dawn[5]](http://lh3.ggpht.com/-c4nQnKiXqK8/Uick3qnVzkI/AAAAAAAAjCg/I8mLqdVrGoE/early%252520dawn%25255B5%25255D%25255B3%25255D.jpg?imgmax=800)
![island blossom[5] island blossom[5]](http://lh3.ggpht.com/-0rqyftUsozU/Uick4by6k-I/AAAAAAAAjCs/52bPjh65VMM/island%252520blossom%25255B5%25255D%25255B3%25255D.jpg?imgmax=800)
![mouse[5] mouse[5]](http://lh4.ggpht.com/-mSBwdQDwSug/Uick4-Ex1BI/AAAAAAAAjC0/6vcQWRZmNhs/mouse%25255B5%25255D%25255B3%25255D.jpg?imgmax=800)
