Showing posts with label DCWV Blossom Song. Show all posts

14_05

SOUS Circle Challenge

Happy Friday crafty friends,
Hope you’re getting ready to enjoy a wonderful weekend. For those reading along with me in Psalms for the counting of the Omer, here is today’s passage.
ק (Kuf)
145 Wholeheartedly I am calling on you; 
answer me, Adonai; I will keep your laws. 
146 I am calling on you; save me; 
and I will observe your instruction. 
147 I rise before dawn and cry for help; 
I put my hope in your word. 
148 My eyes are open before the night watches, 
so that I can meditate on your promise. 
149 In your grace, hear my voice; 
Adonai, in keeping with your justice, revive me. 
150 The pursuers of carnality are getting close; 
they are distancing themselves from your Torah. 
151 You are close by, Adonai; 
and all your mitzvot are truth. 
152 Long ago I learned from your instruction 
that you established it forever.
Psalm 119: 145-152

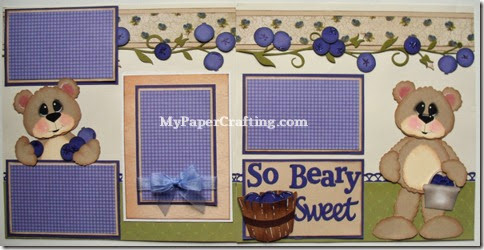
So now on to today’s project. Today is a new die cut challenge day over at SOUS (Stuck On U Sketches).  Our challenge is to create a project with circles. Here is what I came up with.

so beary sweetlo-480wl
Here is a look at my entire layout. I created the bears from the PaperCraftingWorld.com School days CF set.

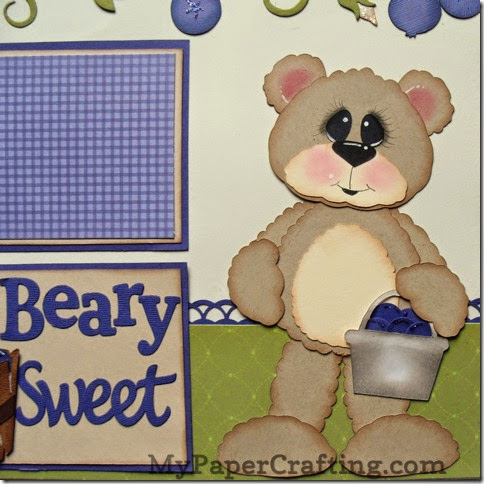
bear w pail-480sq
Here is a closer look at the cute little bear holding his bucket of berries. I created the bucket in my Pazzles software and then cut out a bunch of smaller berries (circles). They had to be smaller than the berries on the border.

bear toppercu-480

beary sweet title-480
I created the basket and the berries in my Pazzles software again. The lettering is some old Quickutz lettering I had. Again the circles in the basket are my berries.

blueberry vinecu-480
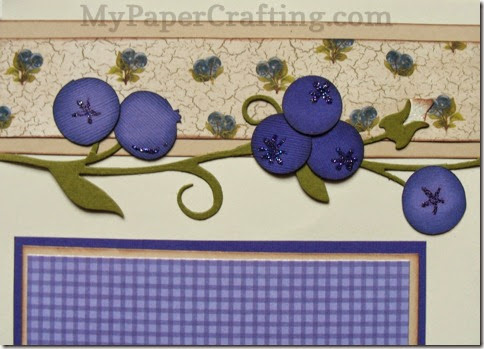
The vine is an older quickutz border die I had and then I created the berries in my Pazzles.

so beary sweet-480
One last look at the layout.

Today is my last challenge with SOUS for this design team term. I have so enjoyed being a part of this lovely and SUPER talented team of crafters. I hope to return to them again some time soon. In the meantime, be sure to head over and check out all they have going on. They have a sketch challenge and a Project life challenge as well as the die cut challenge. Plus they have a monthly prize. You won’t be disappointed going through and checking out the amazing crafty inspiration!

Products Used For this Project
pazzles-cutter-200
Pazzles Inspiration

school days layout ppr-cf-200
School Days CF Set

dcwv blossom song
DCWV Blossom Song

Z2501-adventure
Adventure Ink Pad Set


Z2502-enchantment
Enchantment Ink Pad Set
Z2503-basics
Basics Ink Pad Set
basic cardstock pack-200

white cardstock-200 kraft cardstock-200
foam tape-200 memory book glue dots-200 tape runner-200

I have decided to start selling some of my projects on EBay again, this will be one of them. You can find my EBay link HERE

Well, that about covers it for today, be sure to come back by tomorrow as I share another fun and hopefully inspiring project. Until then,

14_04

Spellbinders Digital Die Launch Party With Pazzles

spellbinders layout by melinb-480


Hello crafty friends,
I hope you’re having a great Sabbath! Today Pazzles is having a launch party and sharing the new line of Spellbinders Digital Dies. What are these digital dies? Simply put, they are some of the original retired Spellbinders die shapes that have been turned into SVG cutting files for your electronic cutting machines! So if you are new to scrapbooking and didn’t have the chance to purchase any of these wonderful dies, then you are in luck! This partnership makes it possible now! So be sure to head over to the Pazzles Craft Room and check out the hourly projects and enter to win some prizes too!

spellbinders layout by melinb-480
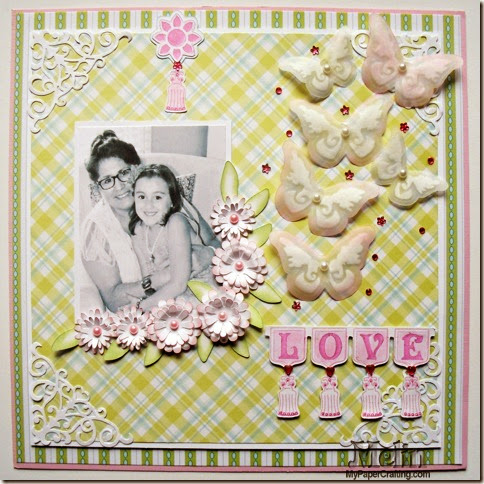
Here’s a look at my entire layout. I used several of the Spellbinders Digital dies to create it. I started by using some Beautiful Papers from the DCWV Blossom Song Stack. I used a base pink paper and then layered the beautiful paper onto tat.. The colors of the picture didn’t really match the layout, so I chose to make it gray scale.

flowers closeup-480
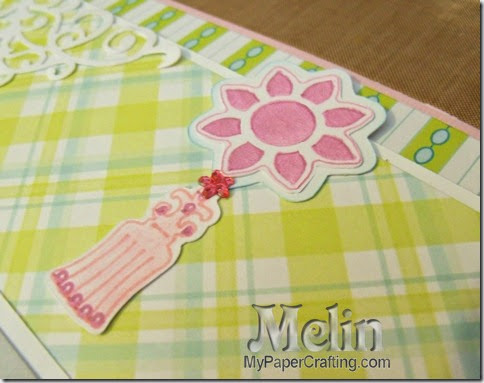
Here is a closer look at the pretty flowers I used from the Flower Creations Digital Die. I layered them and inked them with my Cotton Candy Ink. I then cut the leaves from that collection in white cardstock and inked the edges with my sweet leaf ink. The pearls in the center were from my Paper Studio Pearl Gems pack. BUT they were white so….I used my Copic Marker R27 and colored them. They came out the perfect shade of pink to match my flower petals!

love banner-480
Next I used the Banners digital die and border and created this border. I used the Pazzles Pen tool to draw in all of the elements. I used my pink glitter gel pen and created a “fill” for the letters by using the embossing fill feature in the software. Then I had my Pazzles cut out the entire piece. I added some sweet Queen and Company pink gems to the tassel part.

MEDALLION CLOSEUP-480
Here is another decorative element. I used one of the Flourettes Elements dies. I once again used the embossing fill feature to “fill in” the die and then used my pink glitter gel pen and the pen tool to do all the “coloring in.

vellum engraved butterflies-480
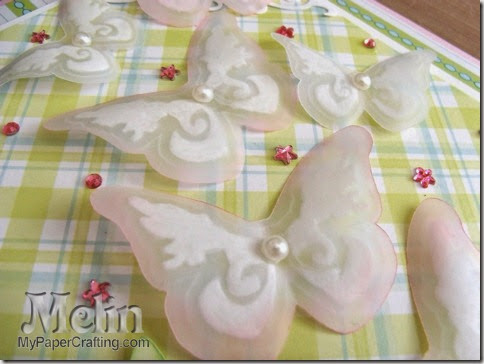
Next,  I used some of my Paper Studio Vellum and used the Spellbinders Butterfly digital die and created these soft and sweet butterflies. I once again used the embossing fill feature to “fill in” the inner part of the butterfly. I used my white gel pen and pen tool to “color in” the white part. The great thing about working with the vellum is that the pressure to the paper automatically creates a “white effect”. I softly inked the edges with my Cotton Candy ink and added some Pearl gems to their centers. I wanted to give them some lift off the paper and so I used some foam adhesive underneath. Then I scattered some more of those pretty little Queen and Company Pink gems. I did also used some traditional Spellbinders dies for the photo corners. The D-Lites Corner Flourishes.

Products Used For This Project

pazzles-cutter-200 dcwv blossom song pazzles embossing tool-200
pen tool-200 Flower Creations S4-109 Flower-Creations-S4-072
Butterflies 2 S3-146 Flourettes S4-200 Banner-Basics-Two-S5-045
spbinders d-lites corner flourish 1514-tombow adhesive
Tape Runner
1772-glue dots
Glue Dots

Z553-chisel tip glue pen
Fine Tip Glue Pen
Z1151-foam tape
Foam Tape
hb pearls
Paper Studio Pearl Gems
Pink Fine Point Sharpie Pen
Pink Gelly Roll Glitter Pen
Pink and White Cardstock
Hobby Lobby Paper Studio Vellum Paper

Well, I think that about covers it. Be sure to head over to the Pazzles Craft Room and check out the other amazing projects by the design team and get in on the launch party action! PLUS....enter for a chance to win a great giveaway!


13_06

Selena Layout: Ribbon Butterflies

Good morning crafty friends,
Today I am sharing a layout I created for my other niece who recently graduated from High School. Her name is Selena. She is another young girl who is as beautiful inside as she is outside. 

Completed layout. The beautiful papers are from the DCWV Blossom Song Stack. They feature a nice variety of papers including some that are glittered and glossy.


Closer look at the scalloped circle mat that frames the photo.


Here's a closer view of the scalloped mat with the ribbon woven through. 


Closer view of the “ribbon butterflies”.
I also added some butterflies I punched out from two different MS punches.


 Another closer view of the ribbon butterflies.
You can also see one of the photo corners.
This was created by using one of the MS corner punch and trimming it out.


How To Create The Ribbon Butterfly-Dragon Fly.


I started with ribbon and cinched it together in the middle with my white thread.


Cut some lightweight chipboard-heavy cardstock in the shape of a body.


Adhered the wings to the body.


Used wire and a larger button for the head. 
Threaded the wire through and then curled the ends to resemble the antennae


Finally I used some additional buttons in graduated sizes for the body length. 
After I adhered the buttons to the body, I trimmed the excess cardstock so that
the body base wouldn't show.  Very quick and easy :-)


I used the following products to complete this layout.

DCWV: Blossom Song Stack

American Crafts Buttons
Misc. Wire
Misc. Pearl Gems
MS Corner Punch and Two Butterfly Punches
White and Soft Pink Cardstock


Be sure to come back by tomorrow and check out
what the lovely Cricutlicious Designers Have For you! Until then,